
Category: Woodworking
-
Two Rustic Ash Bowls From a Log
 Read more…: Two Rustic Ash Bowls From a Log
My friend Jon dropped off a couple ash logs from their property for turning, so I took one and turned some rustic bowls for his wife, Kristin, for her birthday. Here is the log, marked for chainsaw cuts so I can saw out the pith. After cutting: The bark has some nice bug patterns: Now…
-
Adding a Slide Platform to an A-Frame Swing Set
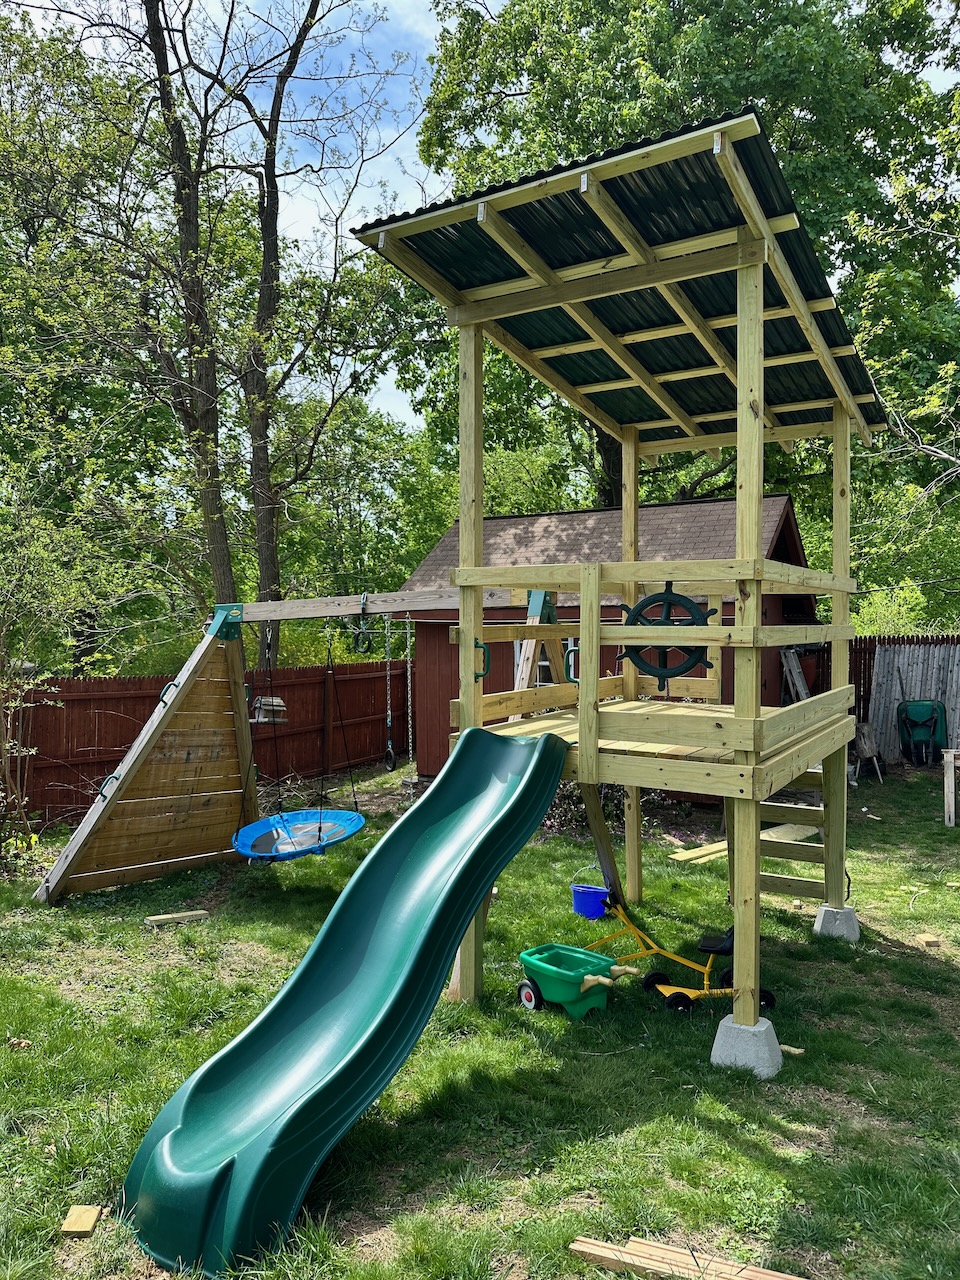 Read more…: Adding a Slide Platform to an A-Frame Swing Set
Part one is making the basic A-frame swing set: https://cagrimmett.com/2022/08/06/building-a-swing-set-with-a-frame-brackets/ Part two is adding a climbing wall: https://cagrimmett.com/2024/03/07/adding-a-climbing-wall-to-an-a-frame-swing-set/ This is part three. Three years ago I built a simple A-frame swing set for my son. Two years ago I added a small climbing wall. This year I added a slide platform! I wrote this post…
-
Walnut handle for a hook remover
 Read more…: Walnut handle for a hook remover
Quick project from a couple weeks ago: Turning a handle out of walnut for a hook remover. Hook removers are great for quickly unhooking fish without touching them (which can harm their protective mucus layer.) You just hook them on your tippet, run them down and over the hook, and the hook usually slides right…
-
Turning smaller tenkara line spools
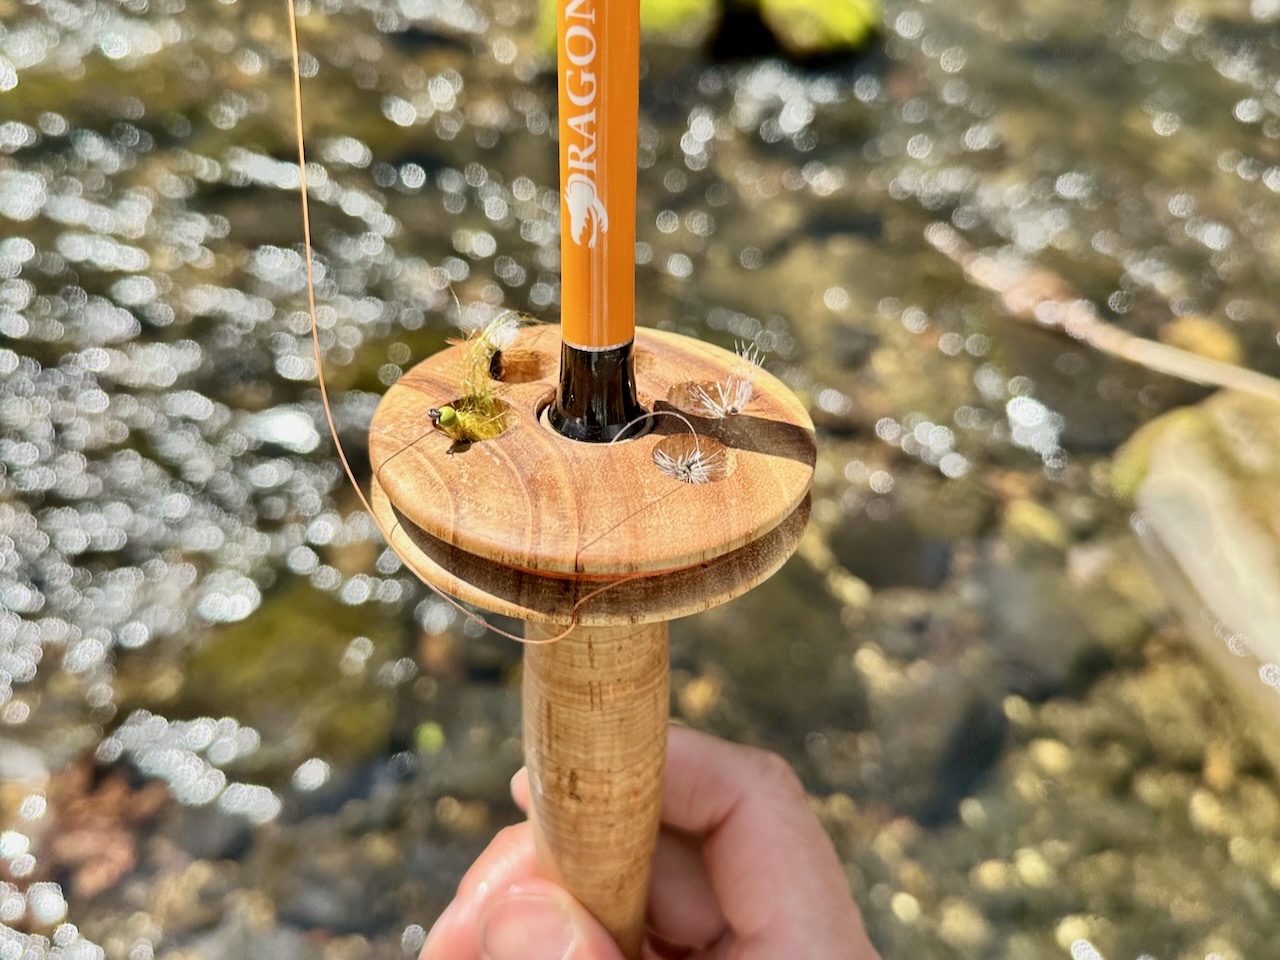 Read more…: Turning smaller tenkara line spools
I turned a new set of tenkara line spools earlier this week out of a piece of mimosa wood. From the last set of spools I turned, I gifted the smaller one and kept the larger two-tiered one. After using it for a couple months, I decided that I wanted a smaller, thinner one to…
-
Oak Fruit Bowl
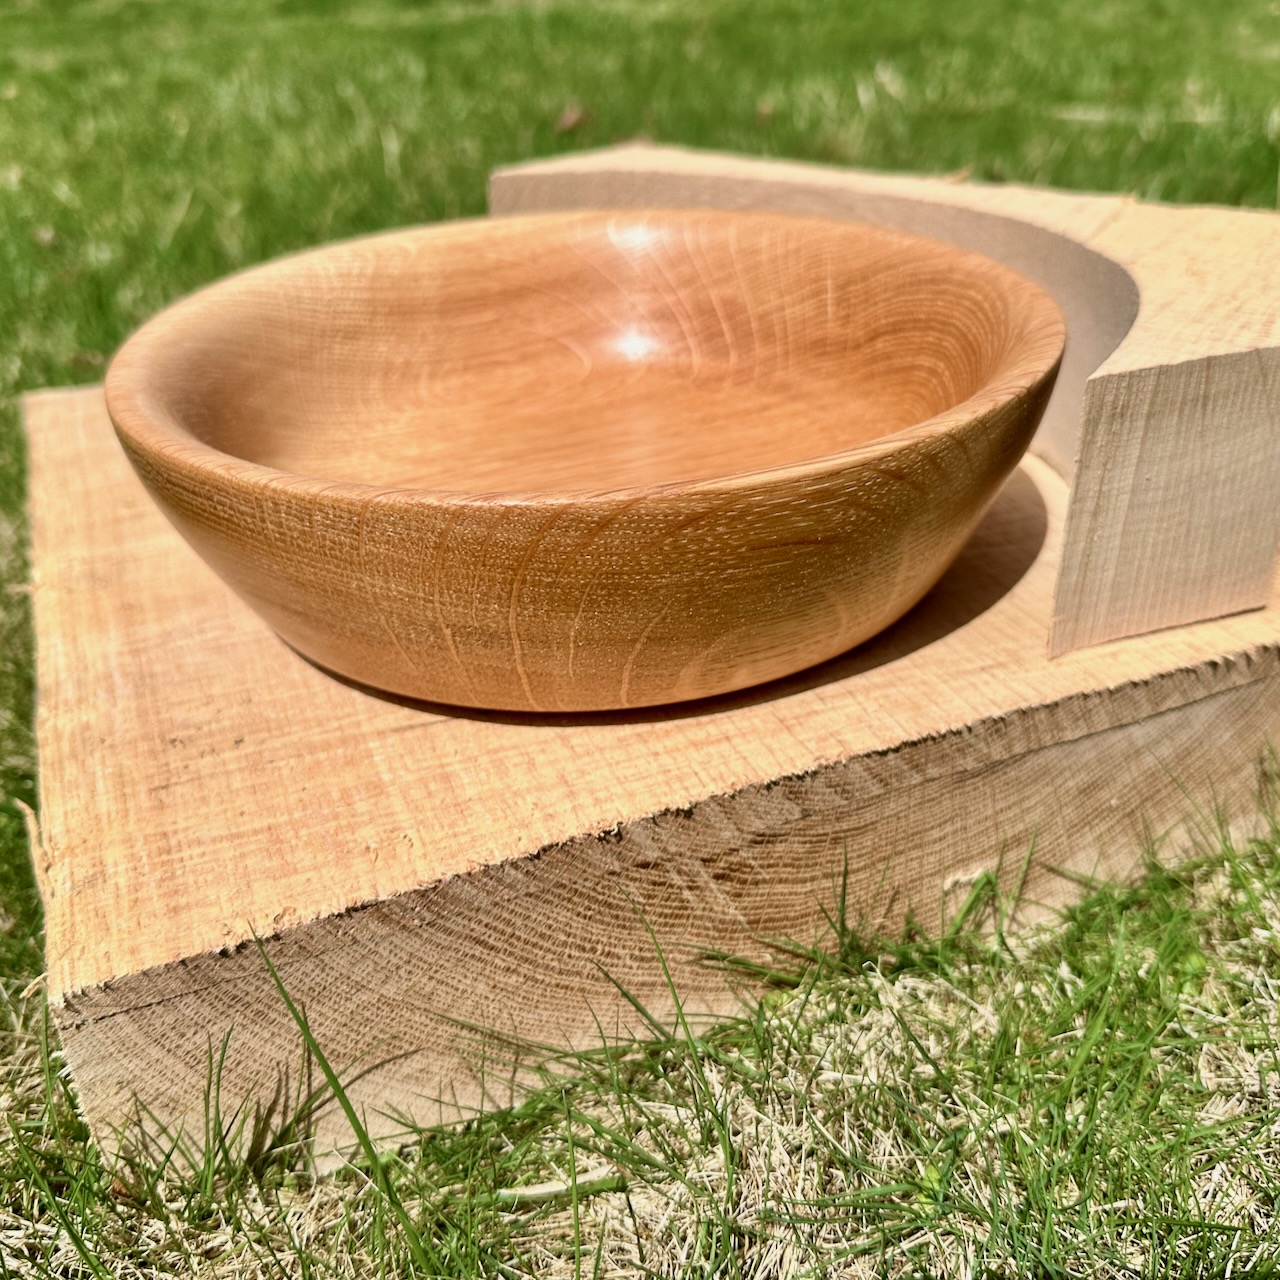 Read more…: Oak Fruit Bowl
I turned a fruit bowl out of oak (from the same tree as the platters) as a gift for my grandfather for his 90th birthday. This was the first project where I got to use a speed reducer on the Shopsmith, so it took me some extra time to set it up and figure out…
-
Oak Platters
 Read more…: Oak Platters
I turned two oak platters recently, both from the same slab, in two different styles. One has a foot, a curved profile, and shallow cavity, the other has a flat bottom, steep edges, and a deeper cavity. A couple years ago, my aunt and uncle in north Georgia had a big Post Oak (in the…
-
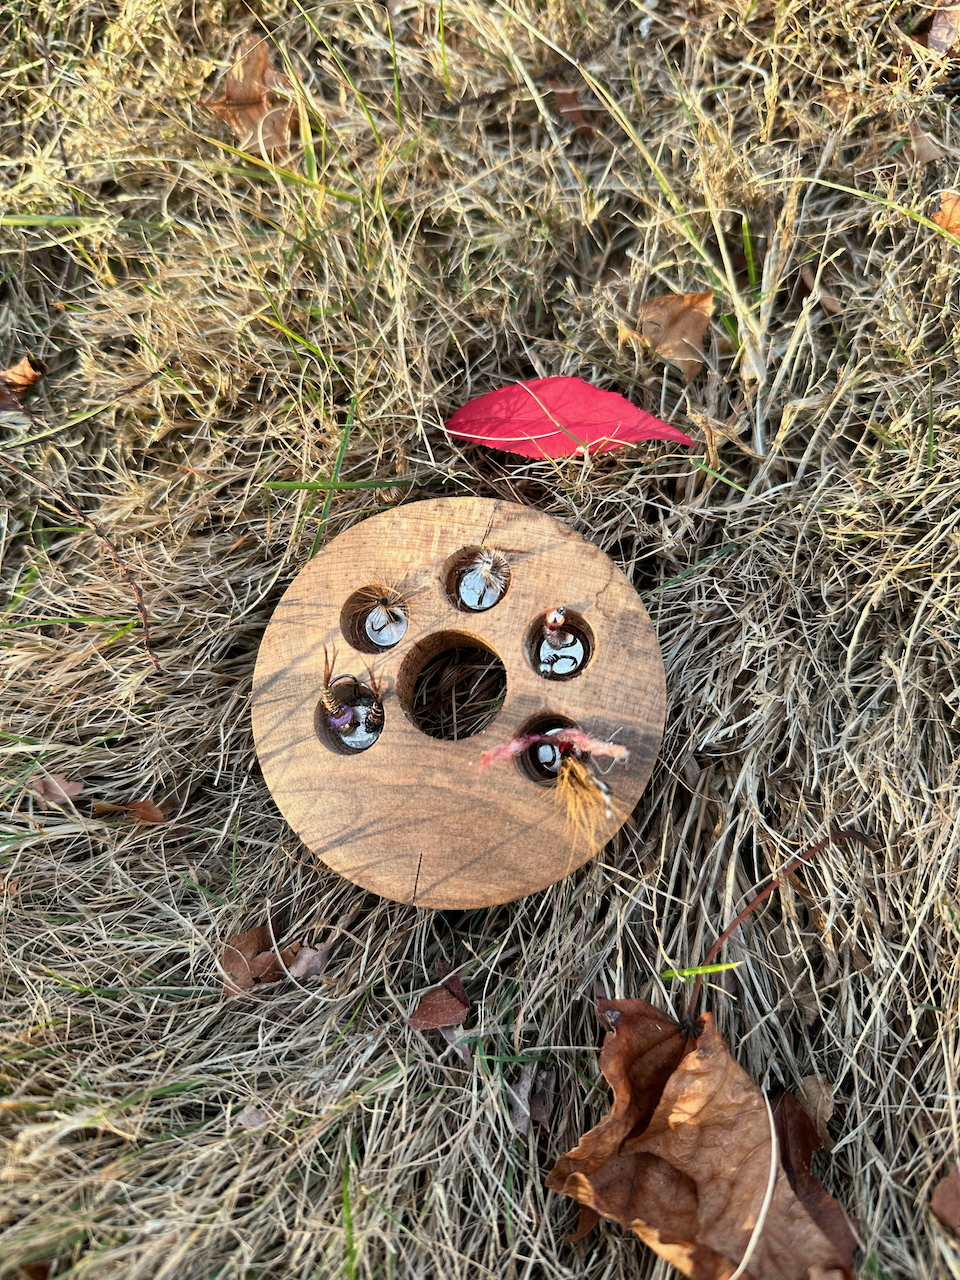
Live edge fly tying vise base
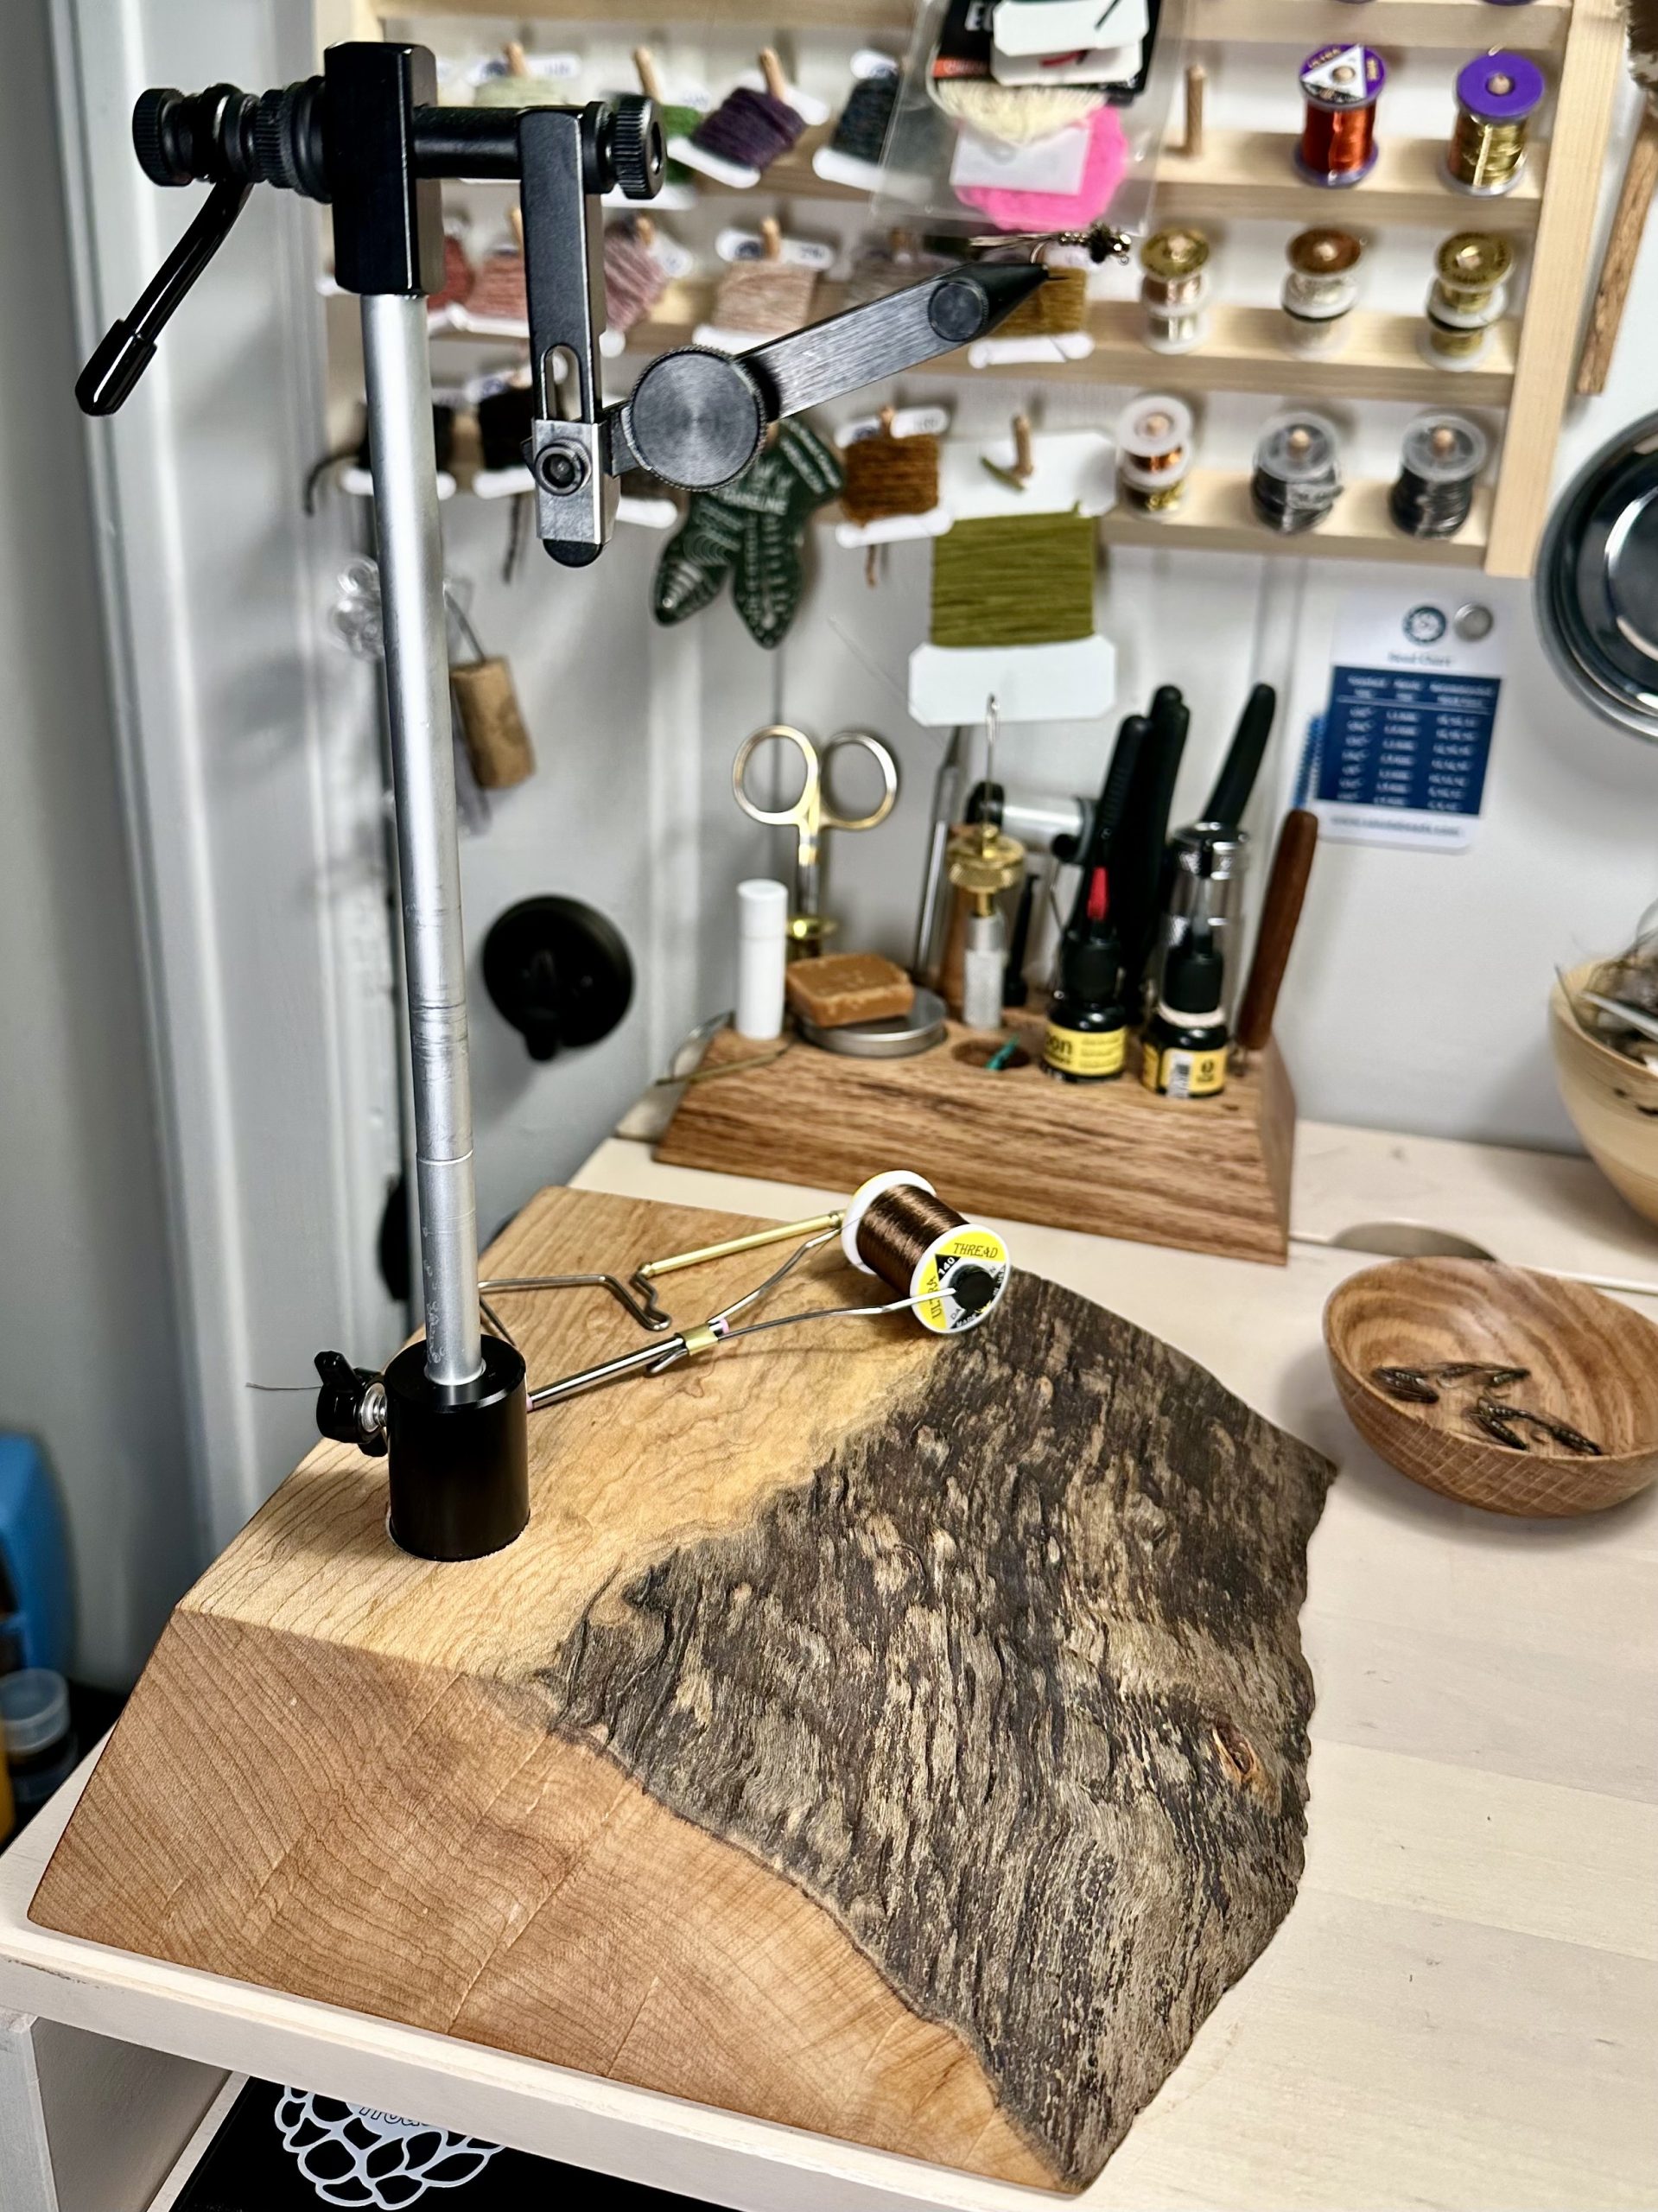 Read more…: Live edge fly tying vise base
I had a Griffin Odyssey Spider that clamped to the table, but I found that kind of limiting. It was shorter than was comfortable, and I found myself hunching. I wanted something taller that I could move around, so I decided to build a base for it. I kept my eye out for the right…
-
Cherry darning ball
 Read more…: Cherry darning ball
My friend Erin at Red Cottage Fiber Studio sent me some photos of a well used (and slightly misused) darning ball for mending fabric that she found at a yard sale. Looks like it was made from a piece of oak. I had a chunk of cherry from their property sitting in my shop, so…
-
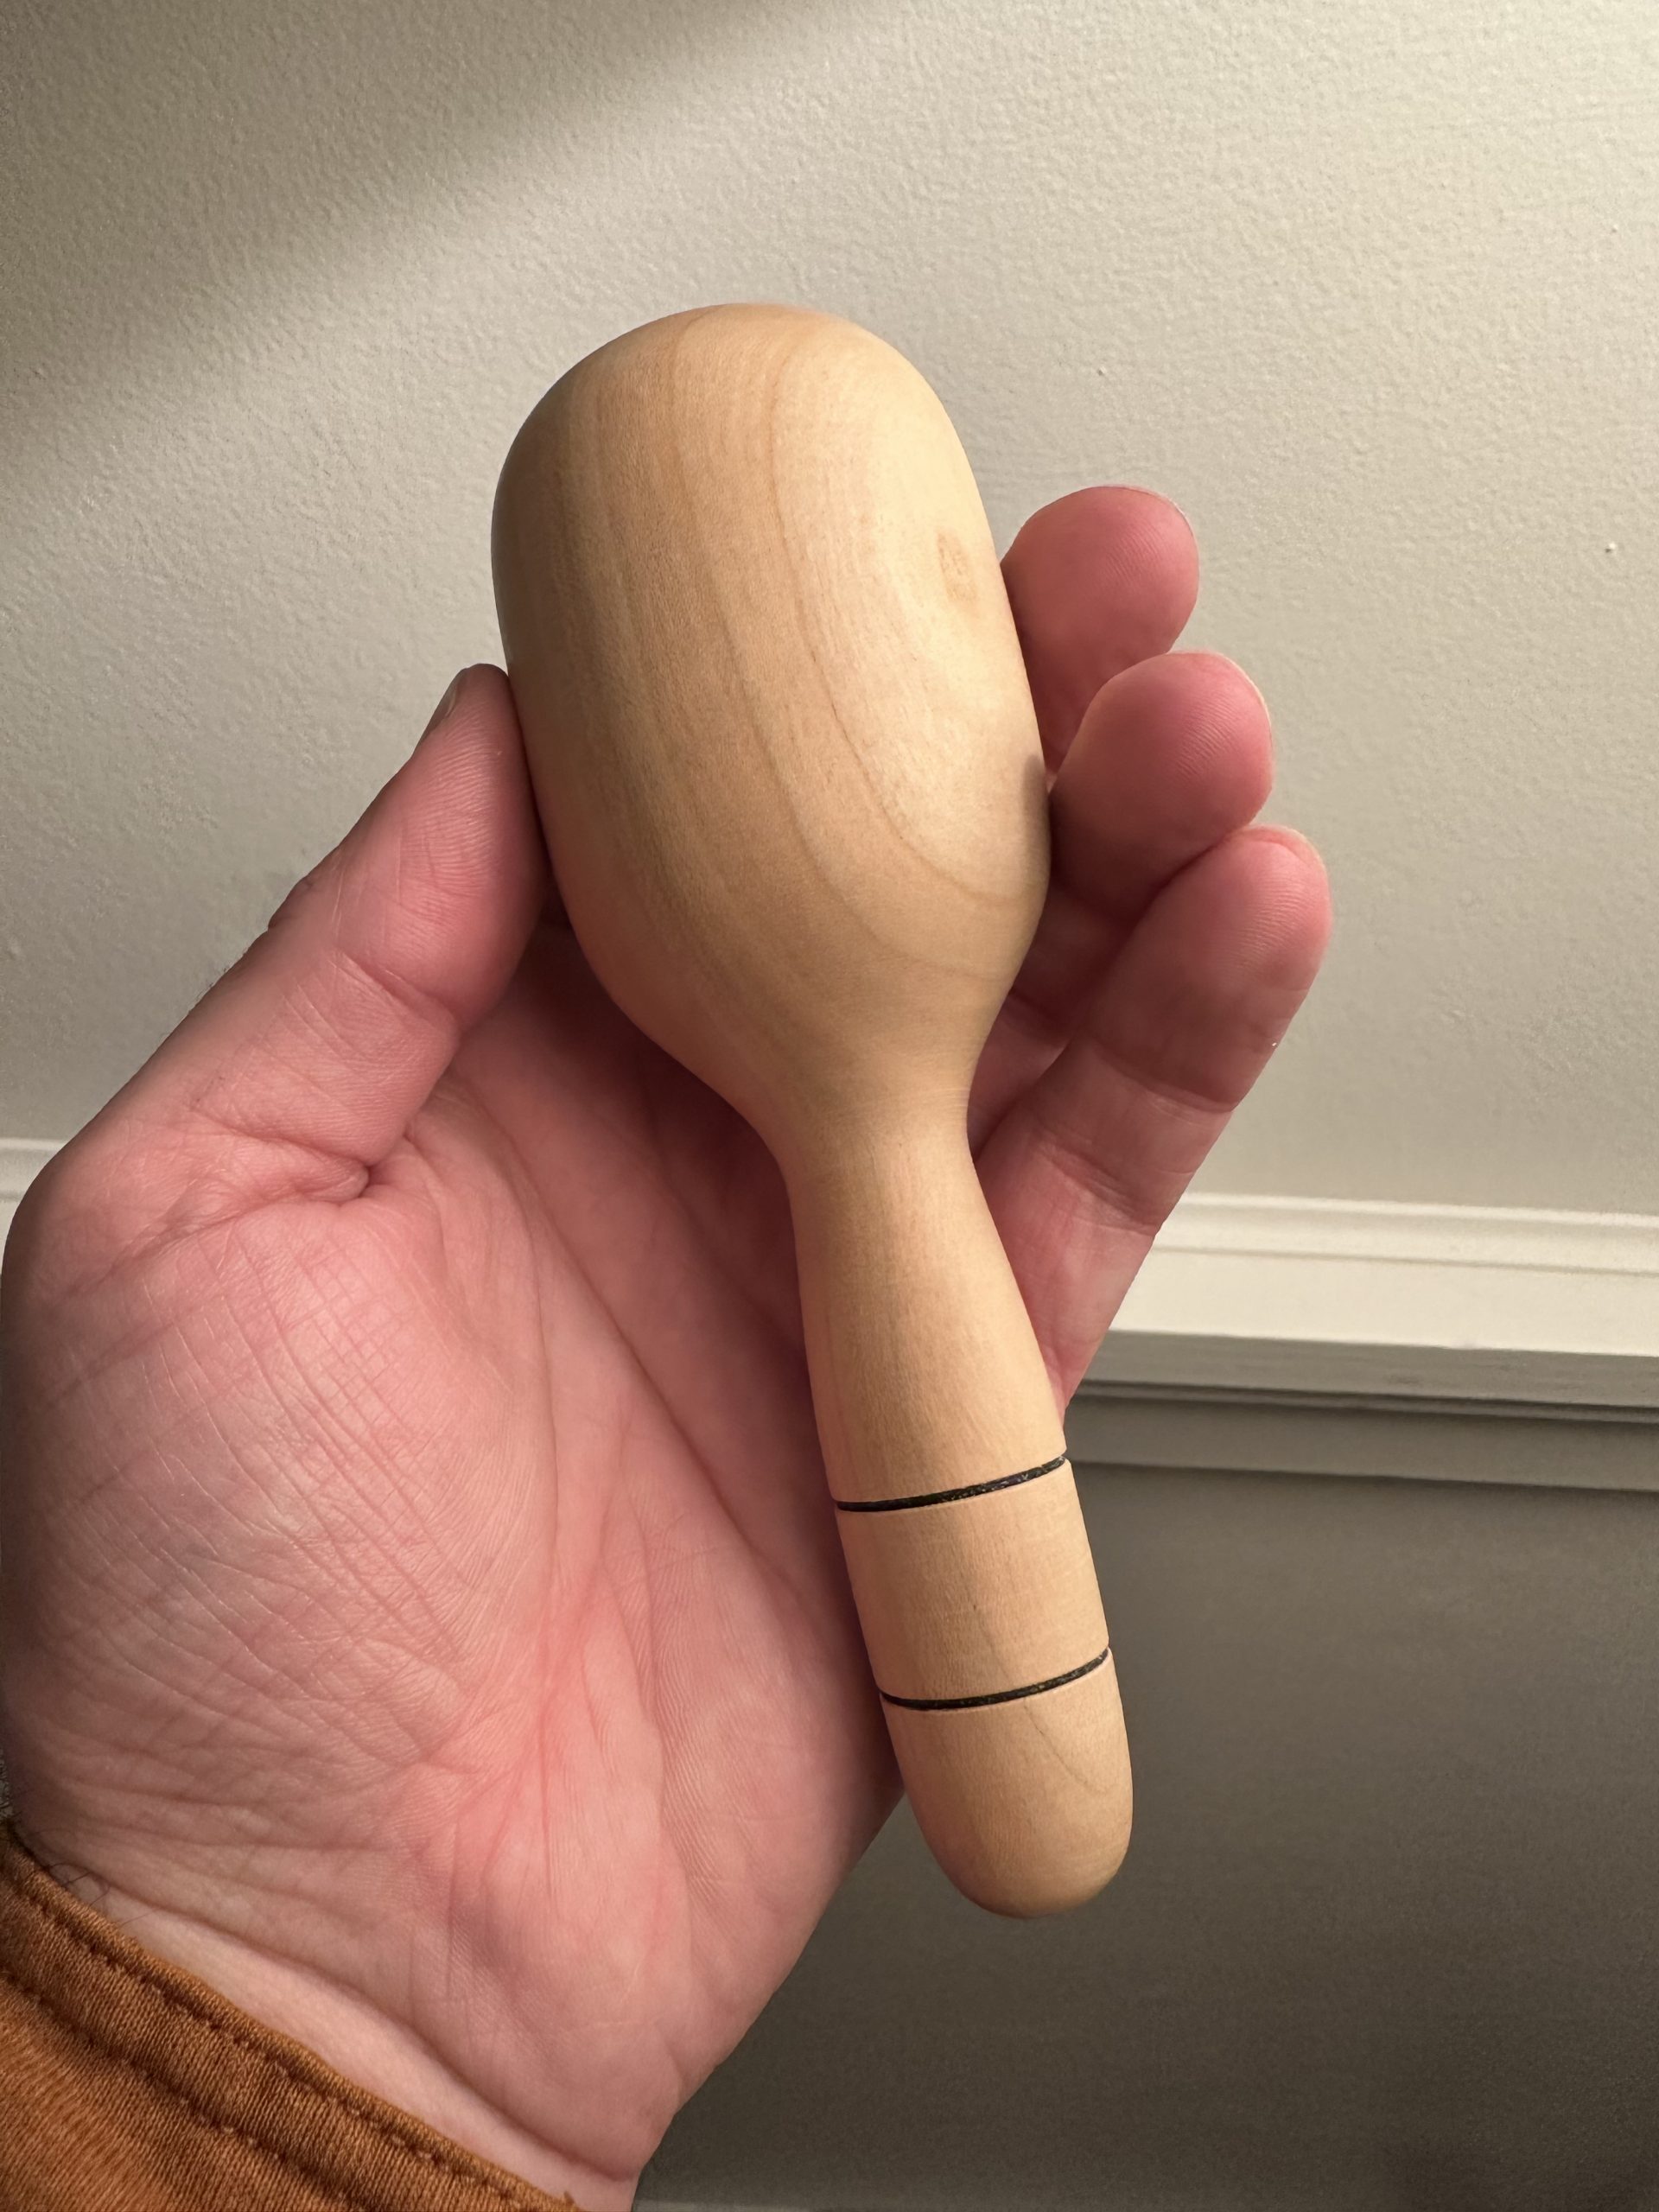
Cherry kitchen mallet
 Read more…: Cherry kitchen mallet
Last week we got invited to a last-minute birthday party the night before. I wanted to turn something on the late that night anyway, so I decided to make a kitchen mallet for a gift. Sometime to crush ice, make cutlets, smash cucumbers, crack peppercorns, etc. I turned it out of a cherry limb that…
-
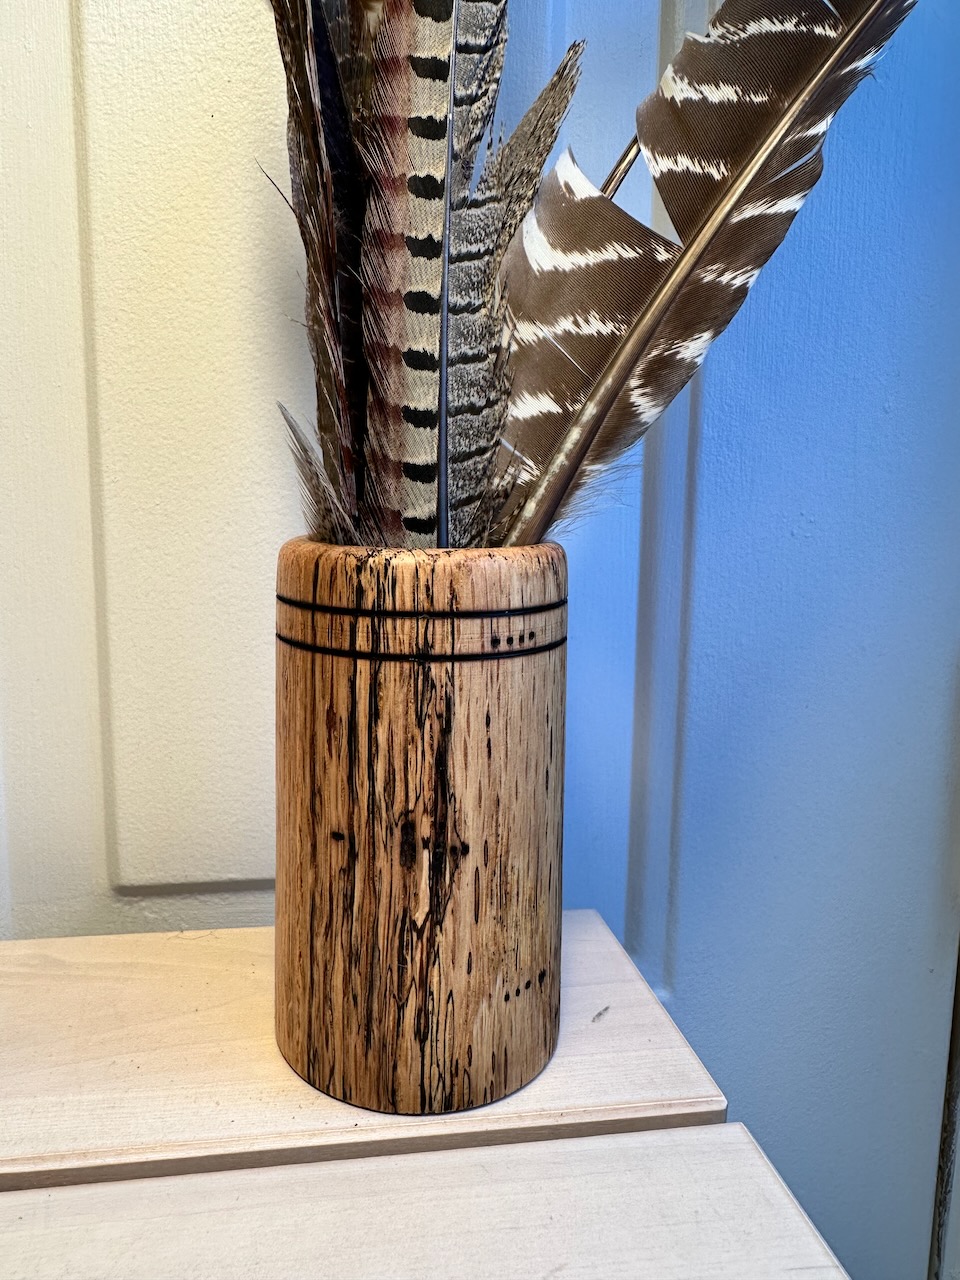
Oak feather cup
 Read more…: Oak feather cup
In an effort to post more, here is an oak cup I turned recently and mentioned briefly in a weekly post that I think deserves its own post. I’ve had this piece of oak in the workshop for a couple years. I roughed it round at some point and abandoned whatever I had in mind…
-
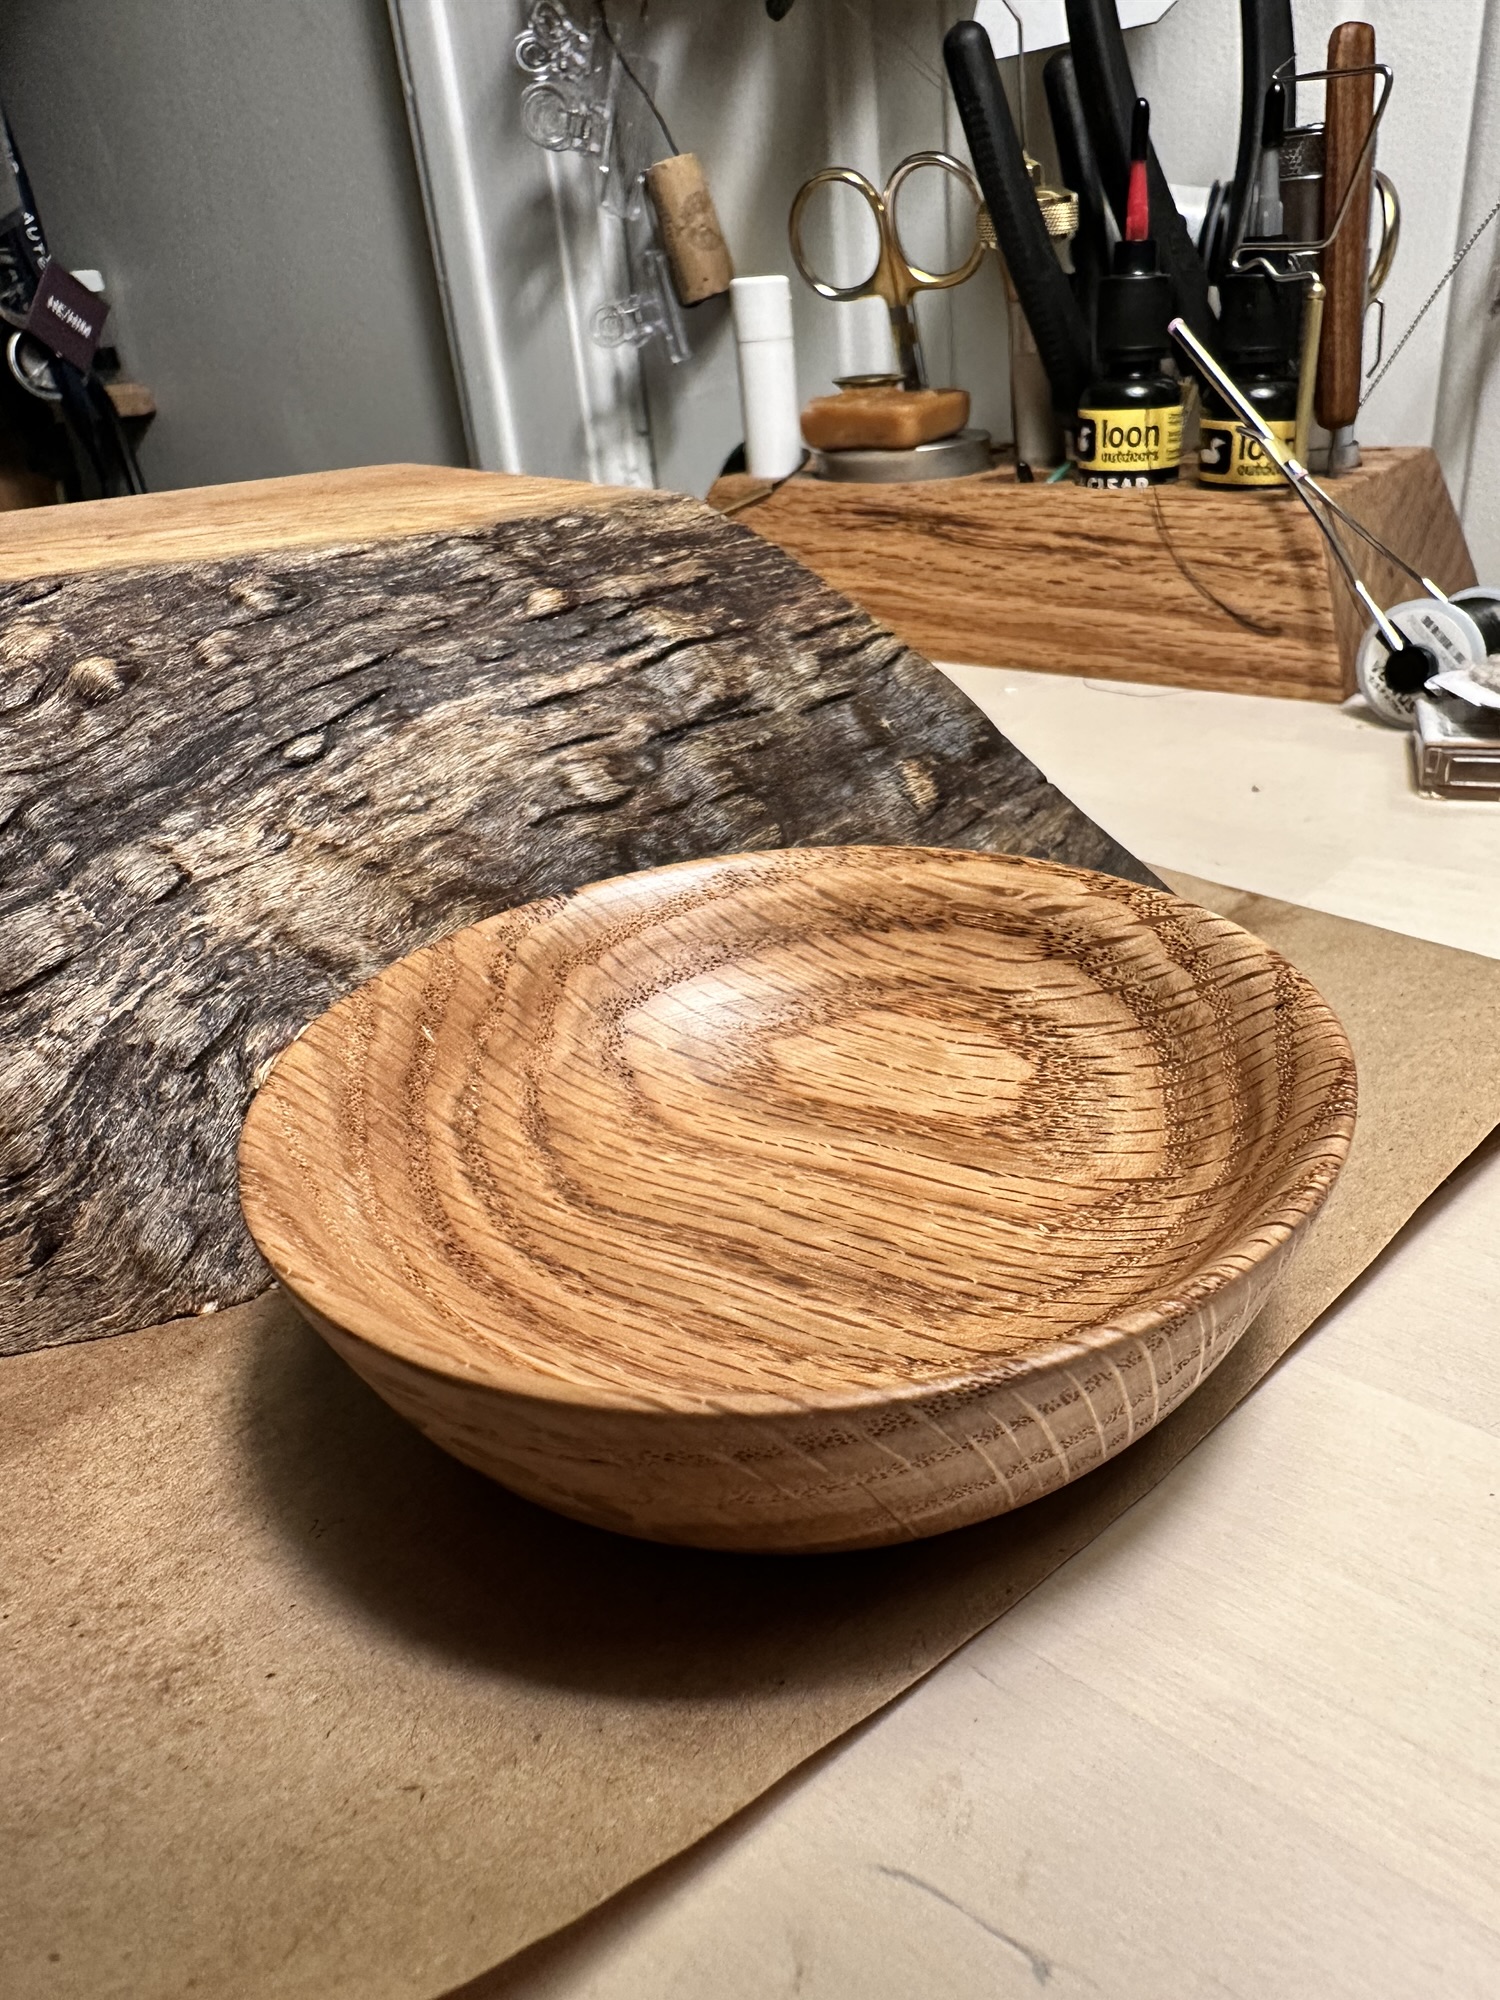
From firewood to oak dish
 Read more…: From firewood to oak dish
In 2020 I helped my dad split some huge oak rounds for firewood. The grain was so straight that I had to grab a couple pieces. At some point in early 2021 I planed them down flat. I think I had three individual foot-long slabs. I’ve used them for various projects the last couple years.…
-
Christmas Bell Ornament
 Read more…: Christmas Bell Ornament
On Instagram, Richard Findley posted his 2024 Festive Turning Challenge: This is the first year I’ve done the challenge, and it comes at a good time because I’ve just turned a couple of bowls, so this was good hollowing practice. Here is the bell I turned out of a piece of cherry:
-
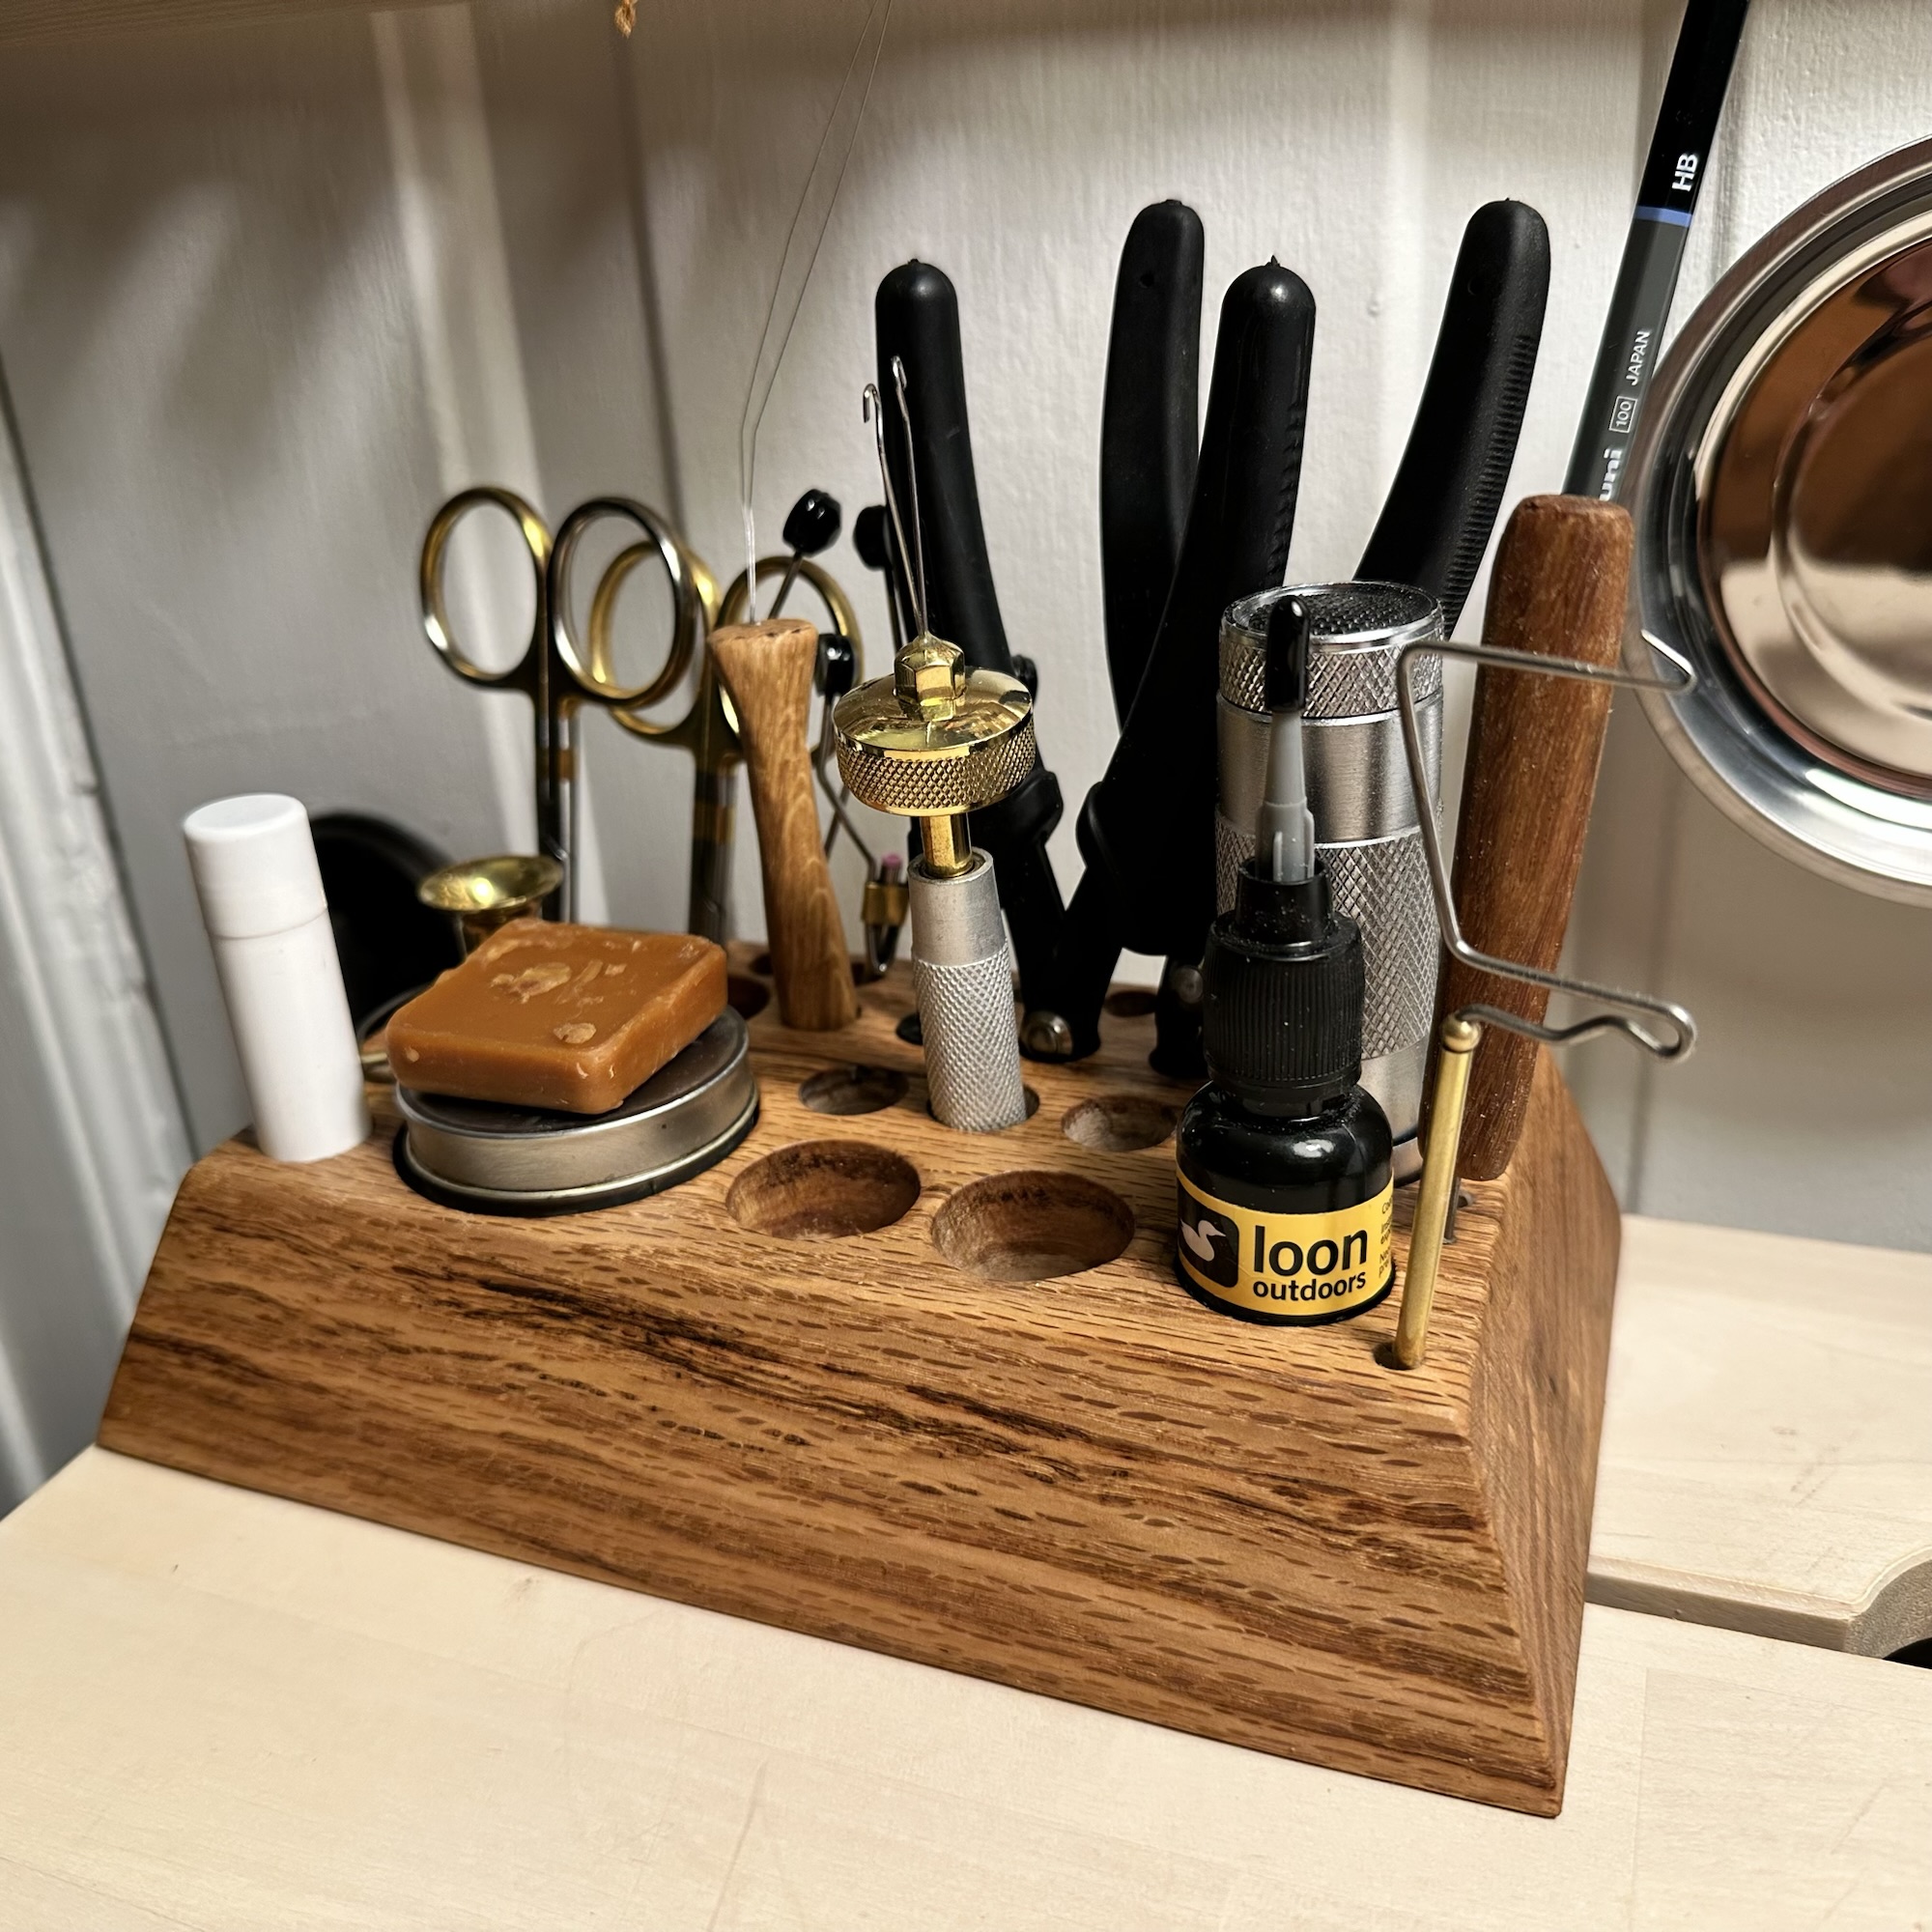
Fly Tying Tool Caddy
 Read more…: Fly Tying Tool Caddy
Since I set up a dedicated fly tying desk, I needed something to hold my tying tools. Over the last two nights after Charlie went to bed, I made one out of a small slab of oak that I split and planed down two years ago. I cut the bevels on the bandsaw, drilled the…
-
Turning Tenkara Line Spools
 Read more…: Turning Tenkara Line Spools
I turned some tenkara line spools out of spalted maple on the lathe. Tenkara spools are something you can wrap your line around while in transit. Tenkara rods are longer than standard fly rods, collapsable, and have a fixed length of line tied to the end instead of a reel. When you move around, a…
-
Wading staff
 Read more…: Wading staff
Quick project this week: A wading staff for fly fishing. Features depth marks, a T-handle with catches carved in to free snags, and magnets to dry out flies. The paracord clips to my waders so I can drop it without worrying about it floating downstream while I’m trying to land a fish. Made from a…
-
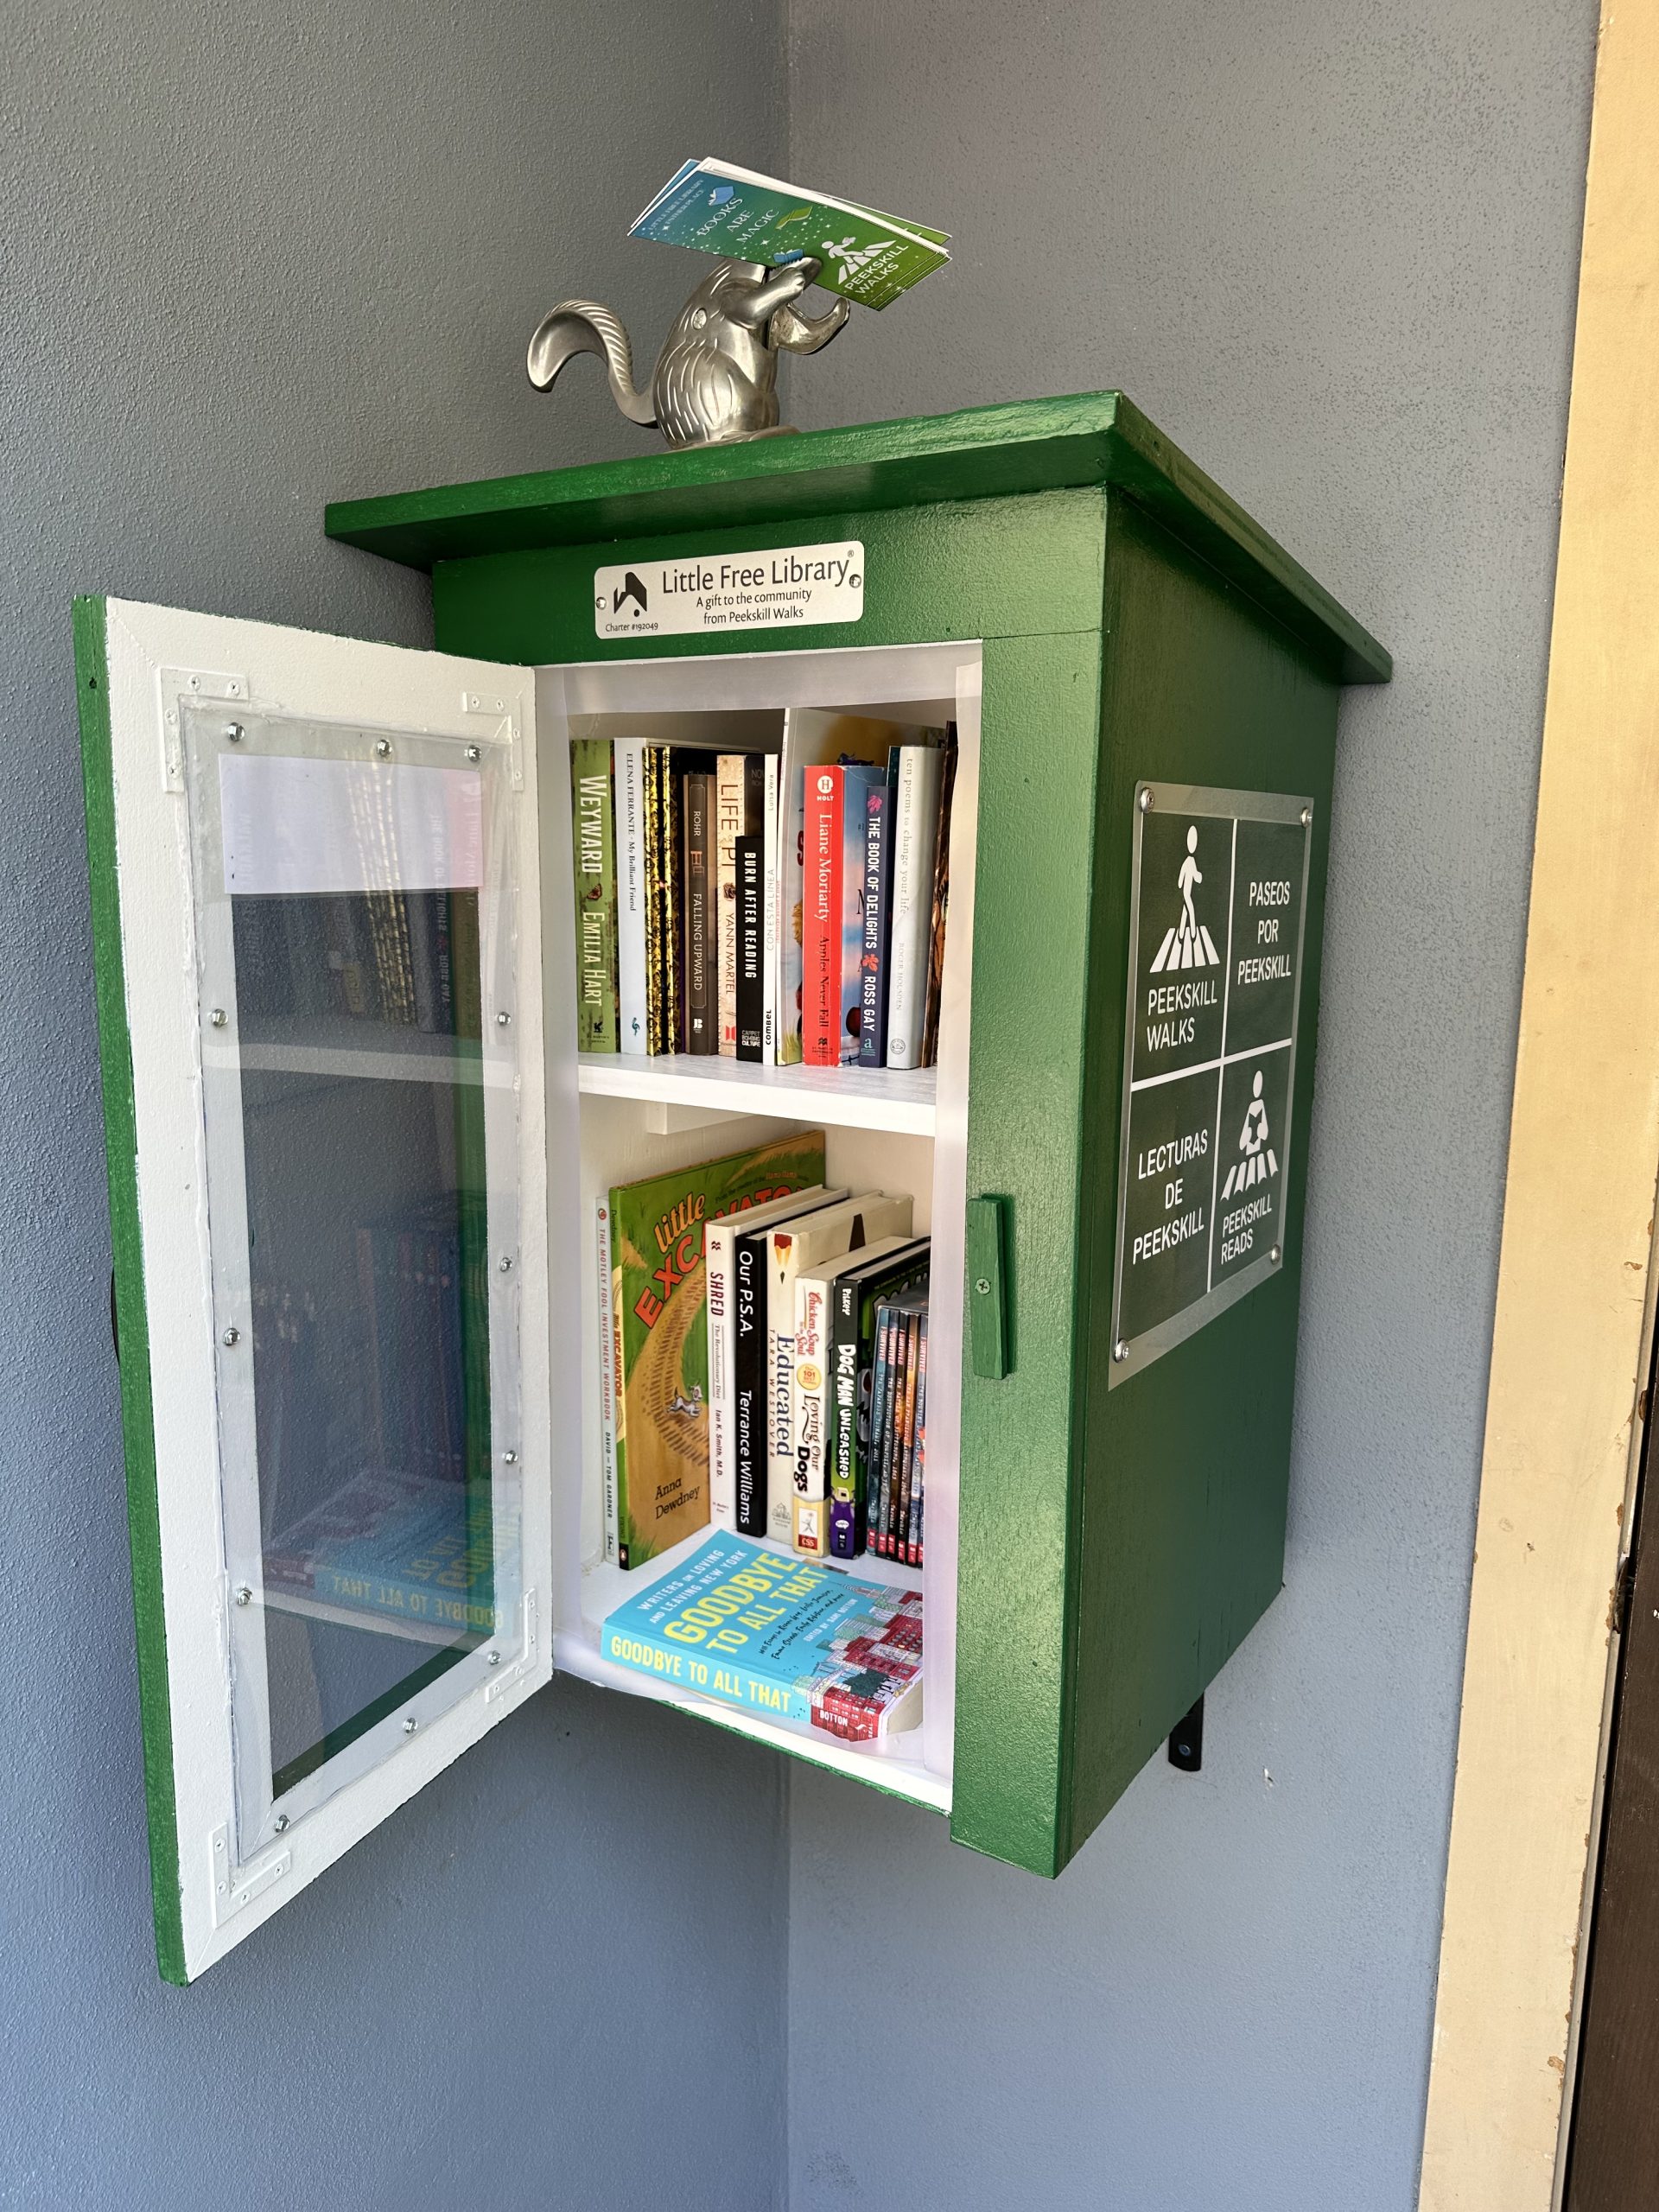
Little Free Library at Esther Place
 Read more…: Little Free Library at Esther Place
Early this summer the founder of Peekskill Walks reached out and asked if I’d be interested in building a Little Free Library for Esther Place, a former street that has been shut down and turned into a much needed outdoor community hangout spot. Sure! I love woodworking, books, and hanging out at Esther Place drinking…
-
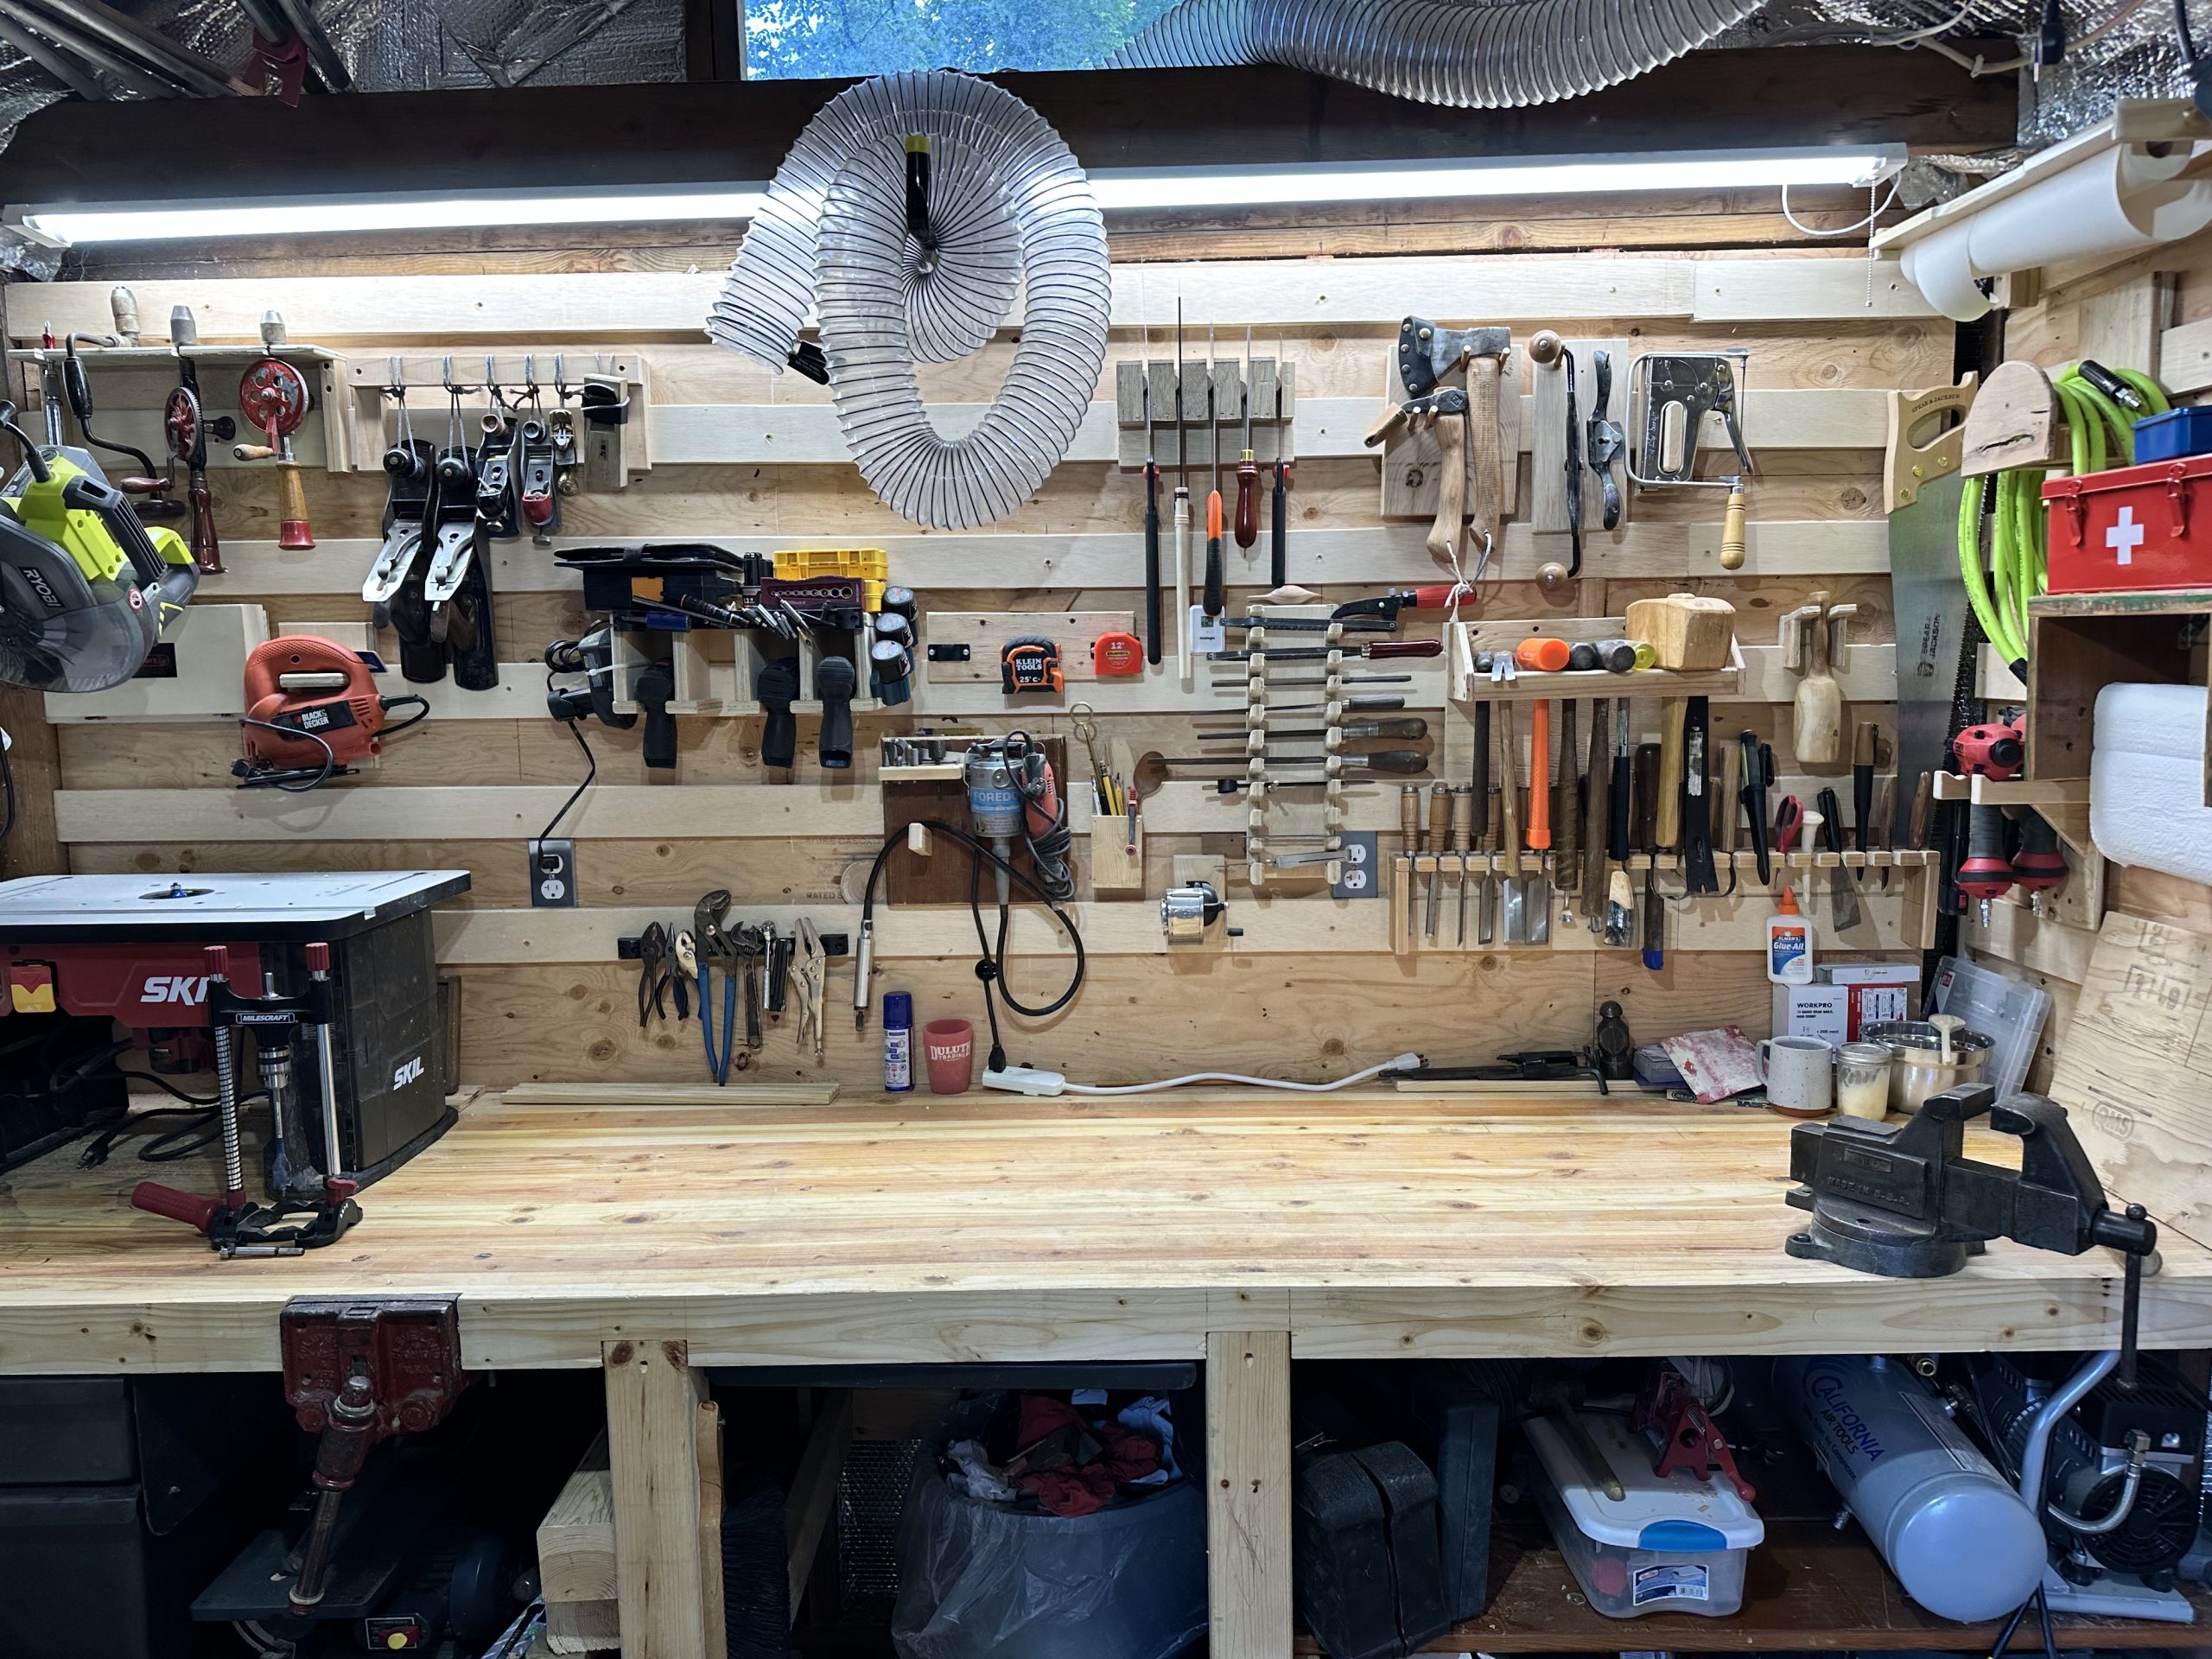
French Cleats
 Read more…: French Cleats
This is part 4 of my workshop upgrade series. Previously: One of my goals with the workshop upgrade was improving my use of space. With only 10x14ft to work with, floor space is at a premium. To keep things off the bench, I need to get them on the walls, but I’m hesitant to make…
-
Turning a T-ball Bat
 Read more…: Turning a T-ball Bat
Charlie started showing some interest in baseball, so I decided to turn a small bat for him on the Shopsmith. Starter t-ball bats are roughly 24″ long and ~ 1.9″ in diameter, so that was my guide. I made this one out of a pine 4×4 I had in the rafters. I know bats are…
-
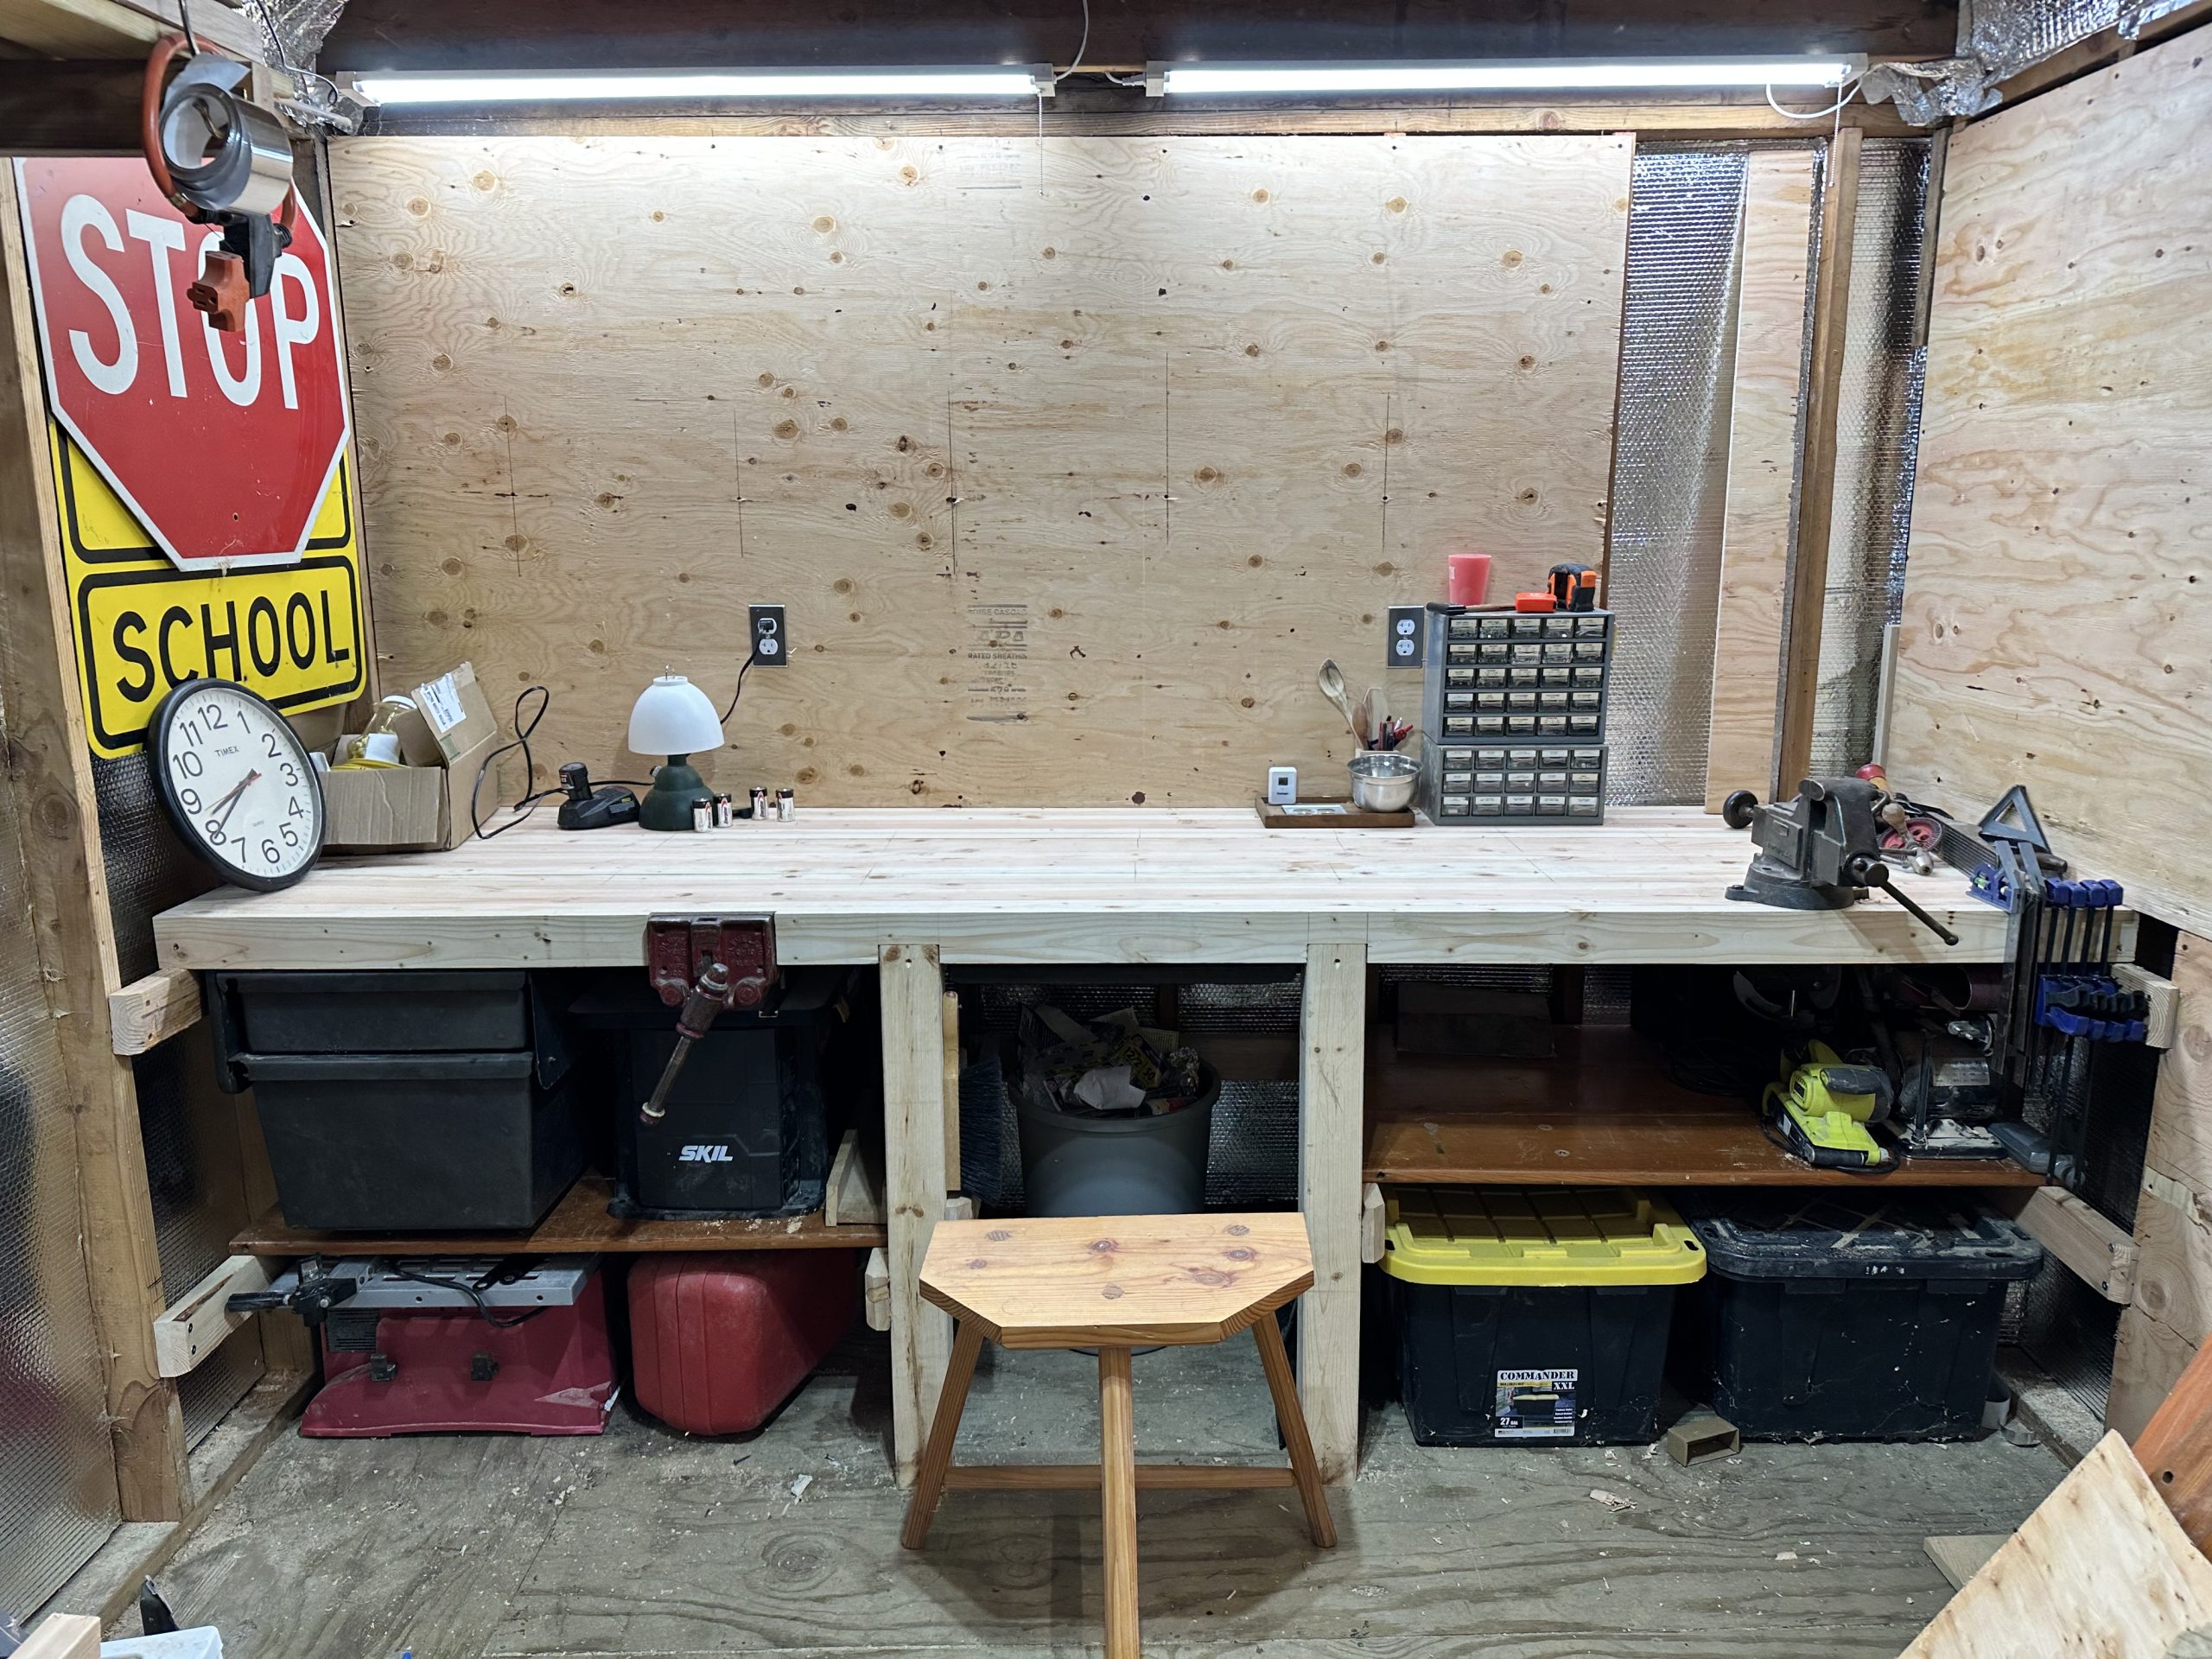
Workbench build
 Read more…: Workbench build
Step two of the workshop upgrade. Previously: Insulating and heating my workshop with a diesel heater Research and design The workshop is a small 10×14′ space, so I needed to be very intentional about where I put this workbench to maximize work area. The previous owner had haphazardly installed a 72″x20″ particleboard desk top as…
-
Adding a Climbing Wall to an A-frame Swing Set
 Read more…: Adding a Climbing Wall to an A-frame Swing Set
Part one is making the basic A-frame swing set: https://cagrimmett.com/2022/08/06/building-a-swing-set-with-a-frame-brackets/ This is part two. Part three is adding a slide platform: https://cagrimmett.com/2025/05/03/adding-a-slide-platform-to-an-a-frame-swing-set/ Last year I added a climbing wall to one of the sides and my son loves it. A friend asked for the details, which made me realize I should have posted the details…