
Step two of the workshop upgrade. Previously: Insulating and heating my workshop with a diesel heater
Research and design
The workshop is a small 10×14′ space, so I needed to be very intentional about where I put this workbench to maximize work area. The previous owner had haphazardly installed a 72″x20″ particleboard desk top as a bench, which I shored up when I moved in, but it was way too small and bounced whenever I used a hammer on it.
I considered a lot of options, and almost went with The Anarchist’s Workbench, but I didn’t have the space to walk around something like this in the middle of the floor, so I decided to go with putting a bench along the full 10′ wall.

For the top I wanted something hefty. The Anarchist’s Workbench calls for 2x6s halved from 2x12s. I thought that was probably overkill for what I needed and more expensive. I opted for cheaper, more readily available 2x4s.
I wanted the top to be 31″ deep so I could slide big plastic totes completely underneath for storage. I also wanted plenty of space to work. 2x4s are actually 1.5×3.5″, so that means I needed (21) 10ft long boards.
Laminating the 2x4s and planing the sections
When I got to the point of laminating the 2x4s, it was still below freezing at night, so I needed to laminate them in my basement so the glue would set.
I laminated them in 3 sets of 7 boards each so they’d fit through my 12″ planer. I laid them out, rolled glue on one side of each board, and clamped them together.
After the first one was done, I ran it through the planer. There were two issues:
- It took a lot of passes to get down below the rounded corners on each one
- The rough-ish edges didn’t stick together as well as I’d hoped. There were some gaps.
I decided for the next two sections it would be better to pre-joint and plane the 2x4s before glueing them, and that make a big difference.
The other thing that made a big difference is that a new set of planer blades came in right before I was ready to plane the final section. The cut was faster and cleaner with the new sharp blades, so I did one final pass on the two I had already planed to both clean them up and ensure the depth of all three matched.


Framing
For stability, we opted to mount the bench to the wall on three sides and support it on the fourth with legs. We used 2×4 stringers on the wall and leveled them (not relative to the floor the wall, because nothing in that shed is square.)
It is 36″ high.
Routing out spots for the carpenter’s vise and legs
We wanted to route out spots to flush-mount the vise and to inset the legs, and we figured it would be easier to route the front section before joining all three sections together. Here was my plan:


Dry fit first.
That’s my Dad routing. We took turns.
Biscuit joining and gluing the three sections
After routing the front section, we used a biscuit joiner and joined the three sections together with glue and biscuits.
A biscuit joiner is ingenious. Since it always cuts at the same depth, you don’t need to sweat minor variations in the depth of the items you are joining, as long as the top is flat.


This was a late night. I think we finally finished around 11:30pm.
Adding legs, shelves, drawers, outlets, and backstop
The next morning we screwed the top in place on the stringers and set to work putting in the legs and the shelves. I varied from my above plans slightly to leave a section in the middle with no shelving for a chair, trash can, vacuum, etc. The shelves are at different heights to accommodate totes on one side and a set of drawers on the other.


We decided to run two outlets for above the work bench, then added plywood, which French Cleats will be later mounted to.

Adding the vises and LED bars


Sanding the top and putting on a coat of finish
I planed and sanded the top to even out some uneven spots, especially at the seams. Then I added a coat of a beeswax and linseed oil blend that I made for stools a couple years ago.

I decided one coat was enough. It is a bench that is going to get dirty and beat up anyway, it isn’t a piece of furniture.
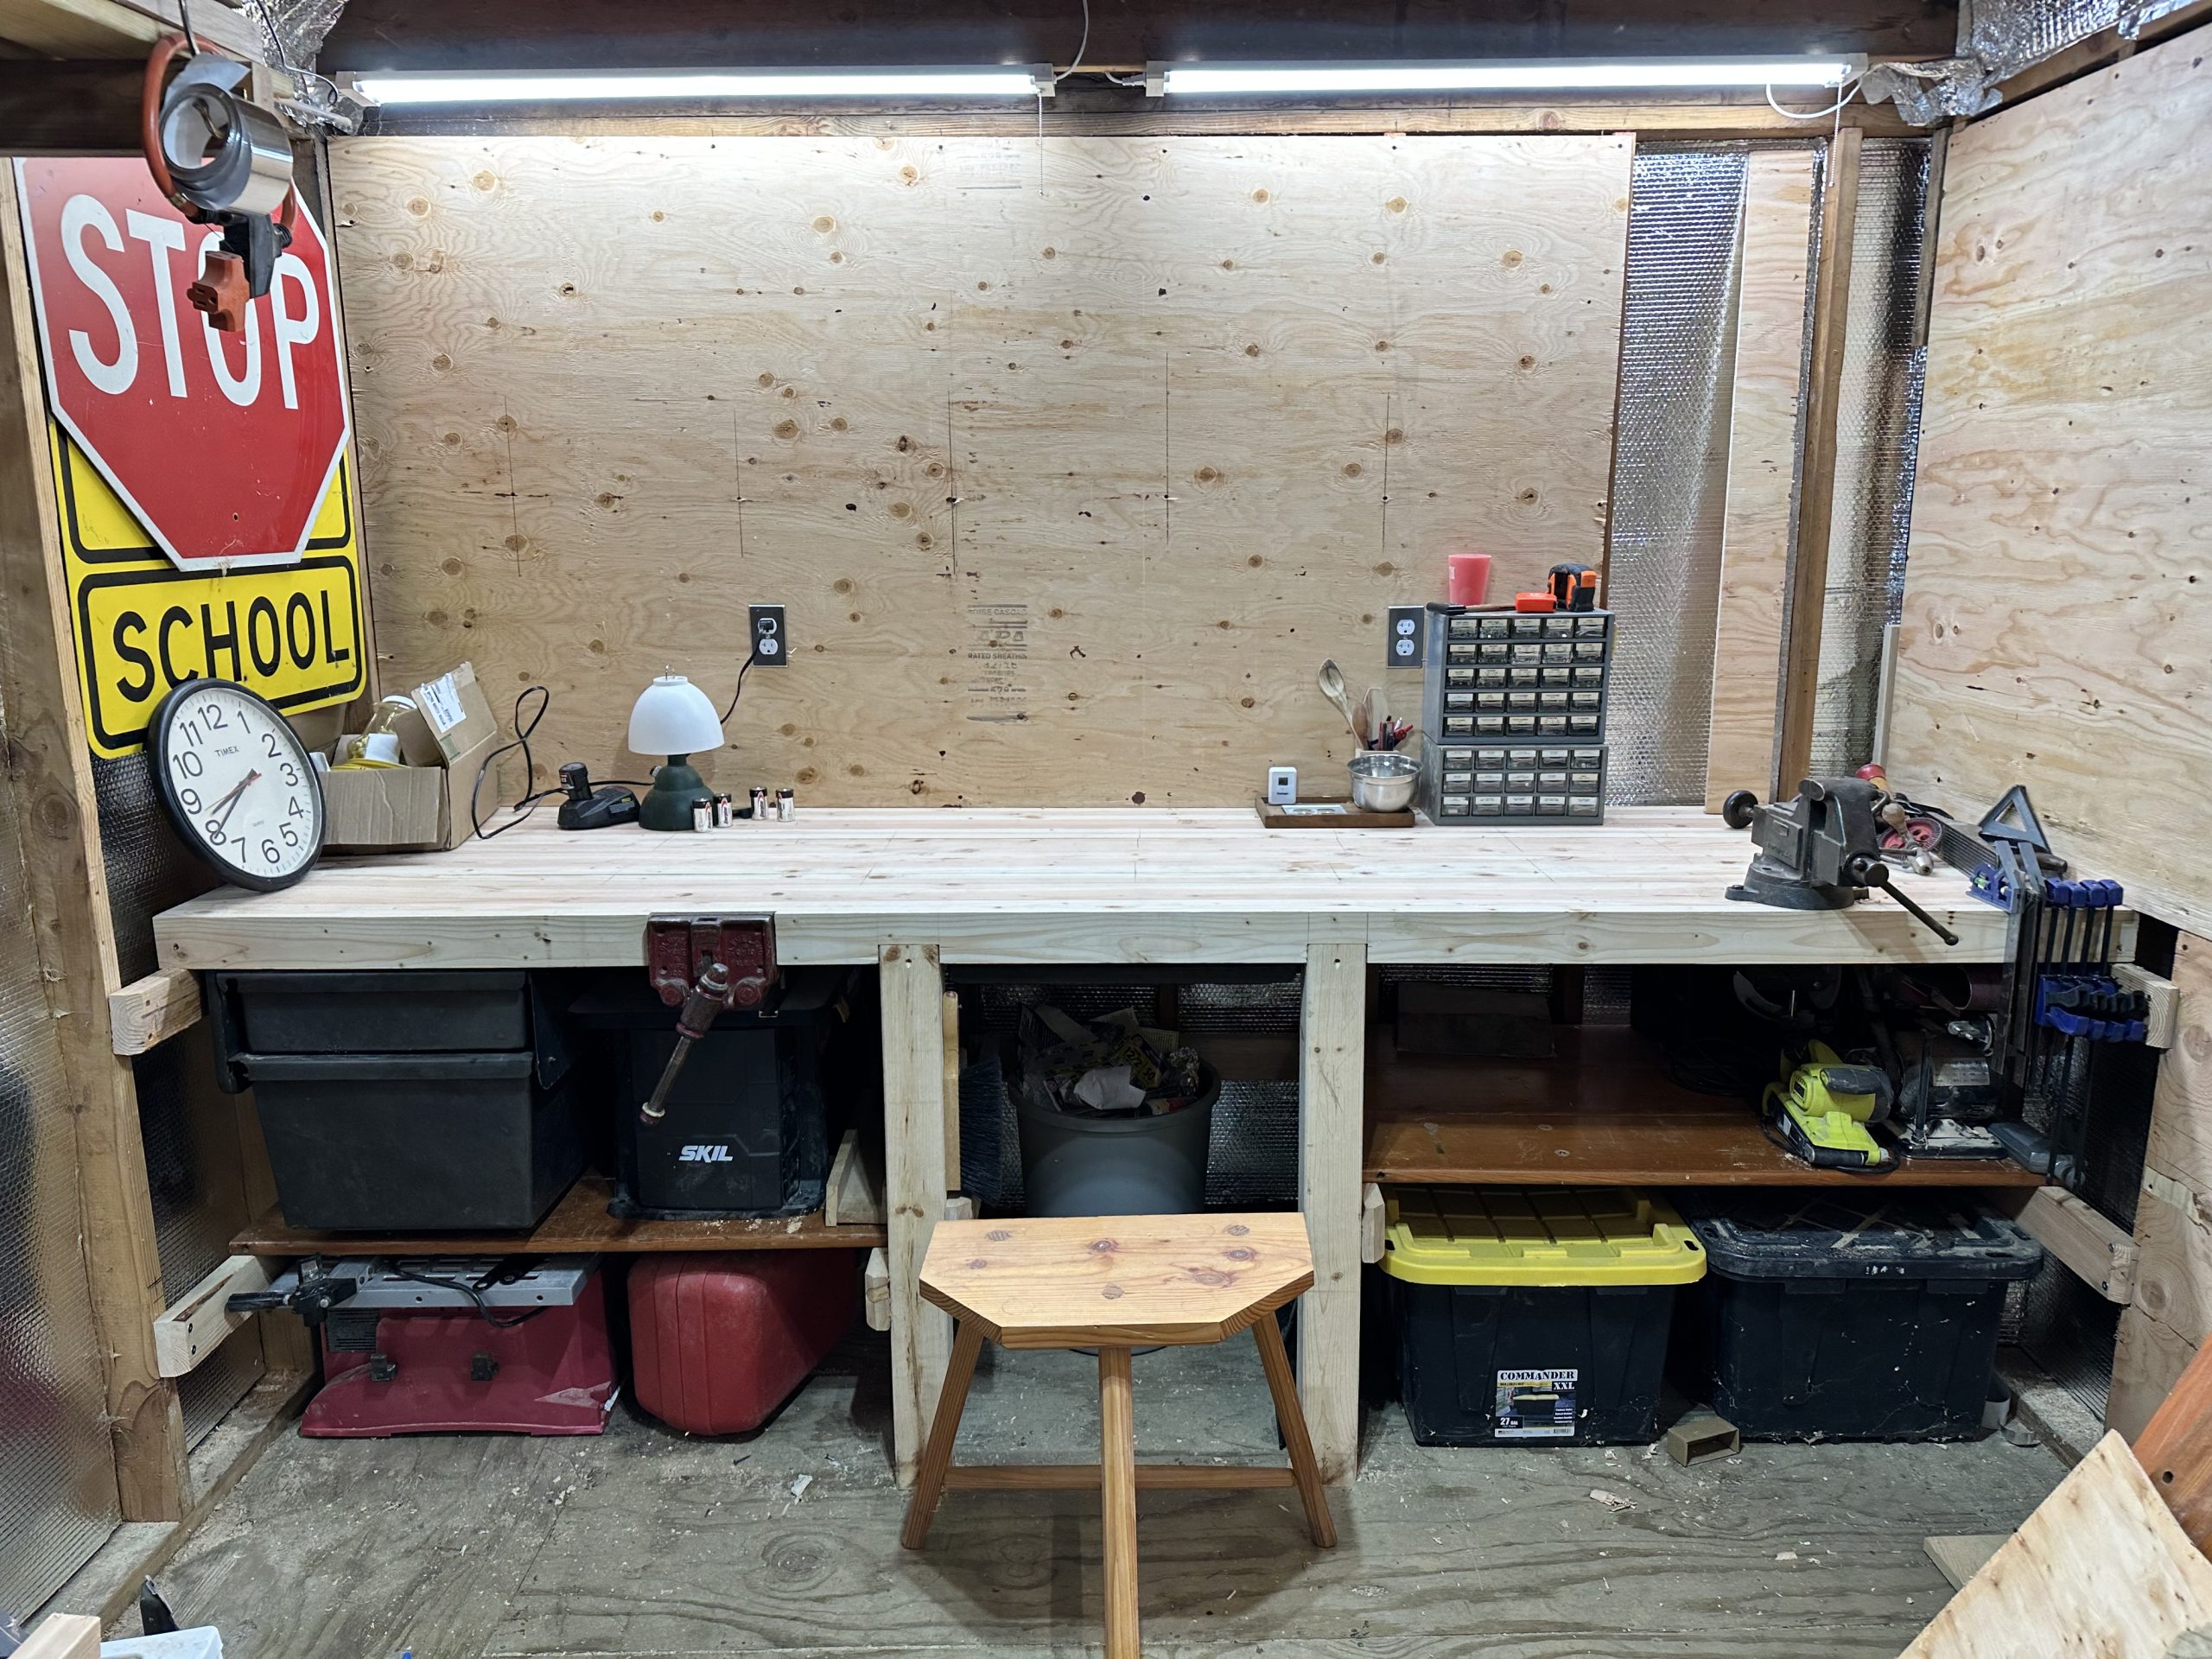
How is it?
Great! It is solid and does not budge or bounce. It has plenty of storage and is the right height for me to stand and work at.
What’s next?
- Adding dust collection (done IRL and post forthcoming)
- Adding french cleats (in progress IRL, post when complete)
- Adding bench dogs (not started)
Leave a Reply