Archives

Month: December 2020

  • Currently reading


    • Sweetbitter by Stephanie Danler
    • Oranges by John McPhee
    • Code of the Woosters by P. G. Wodehouse
    • Hamnet by Maggie O’Farrell
    • Analogia by George Dyson

    Up next:

    • The Book of Eels by Patrik Svensson
    • Looking for a Ship by John McPhee
    • My Brilliant Friend by Elena Ferrante
    • Paris in the Present Tense by Mark Helprin

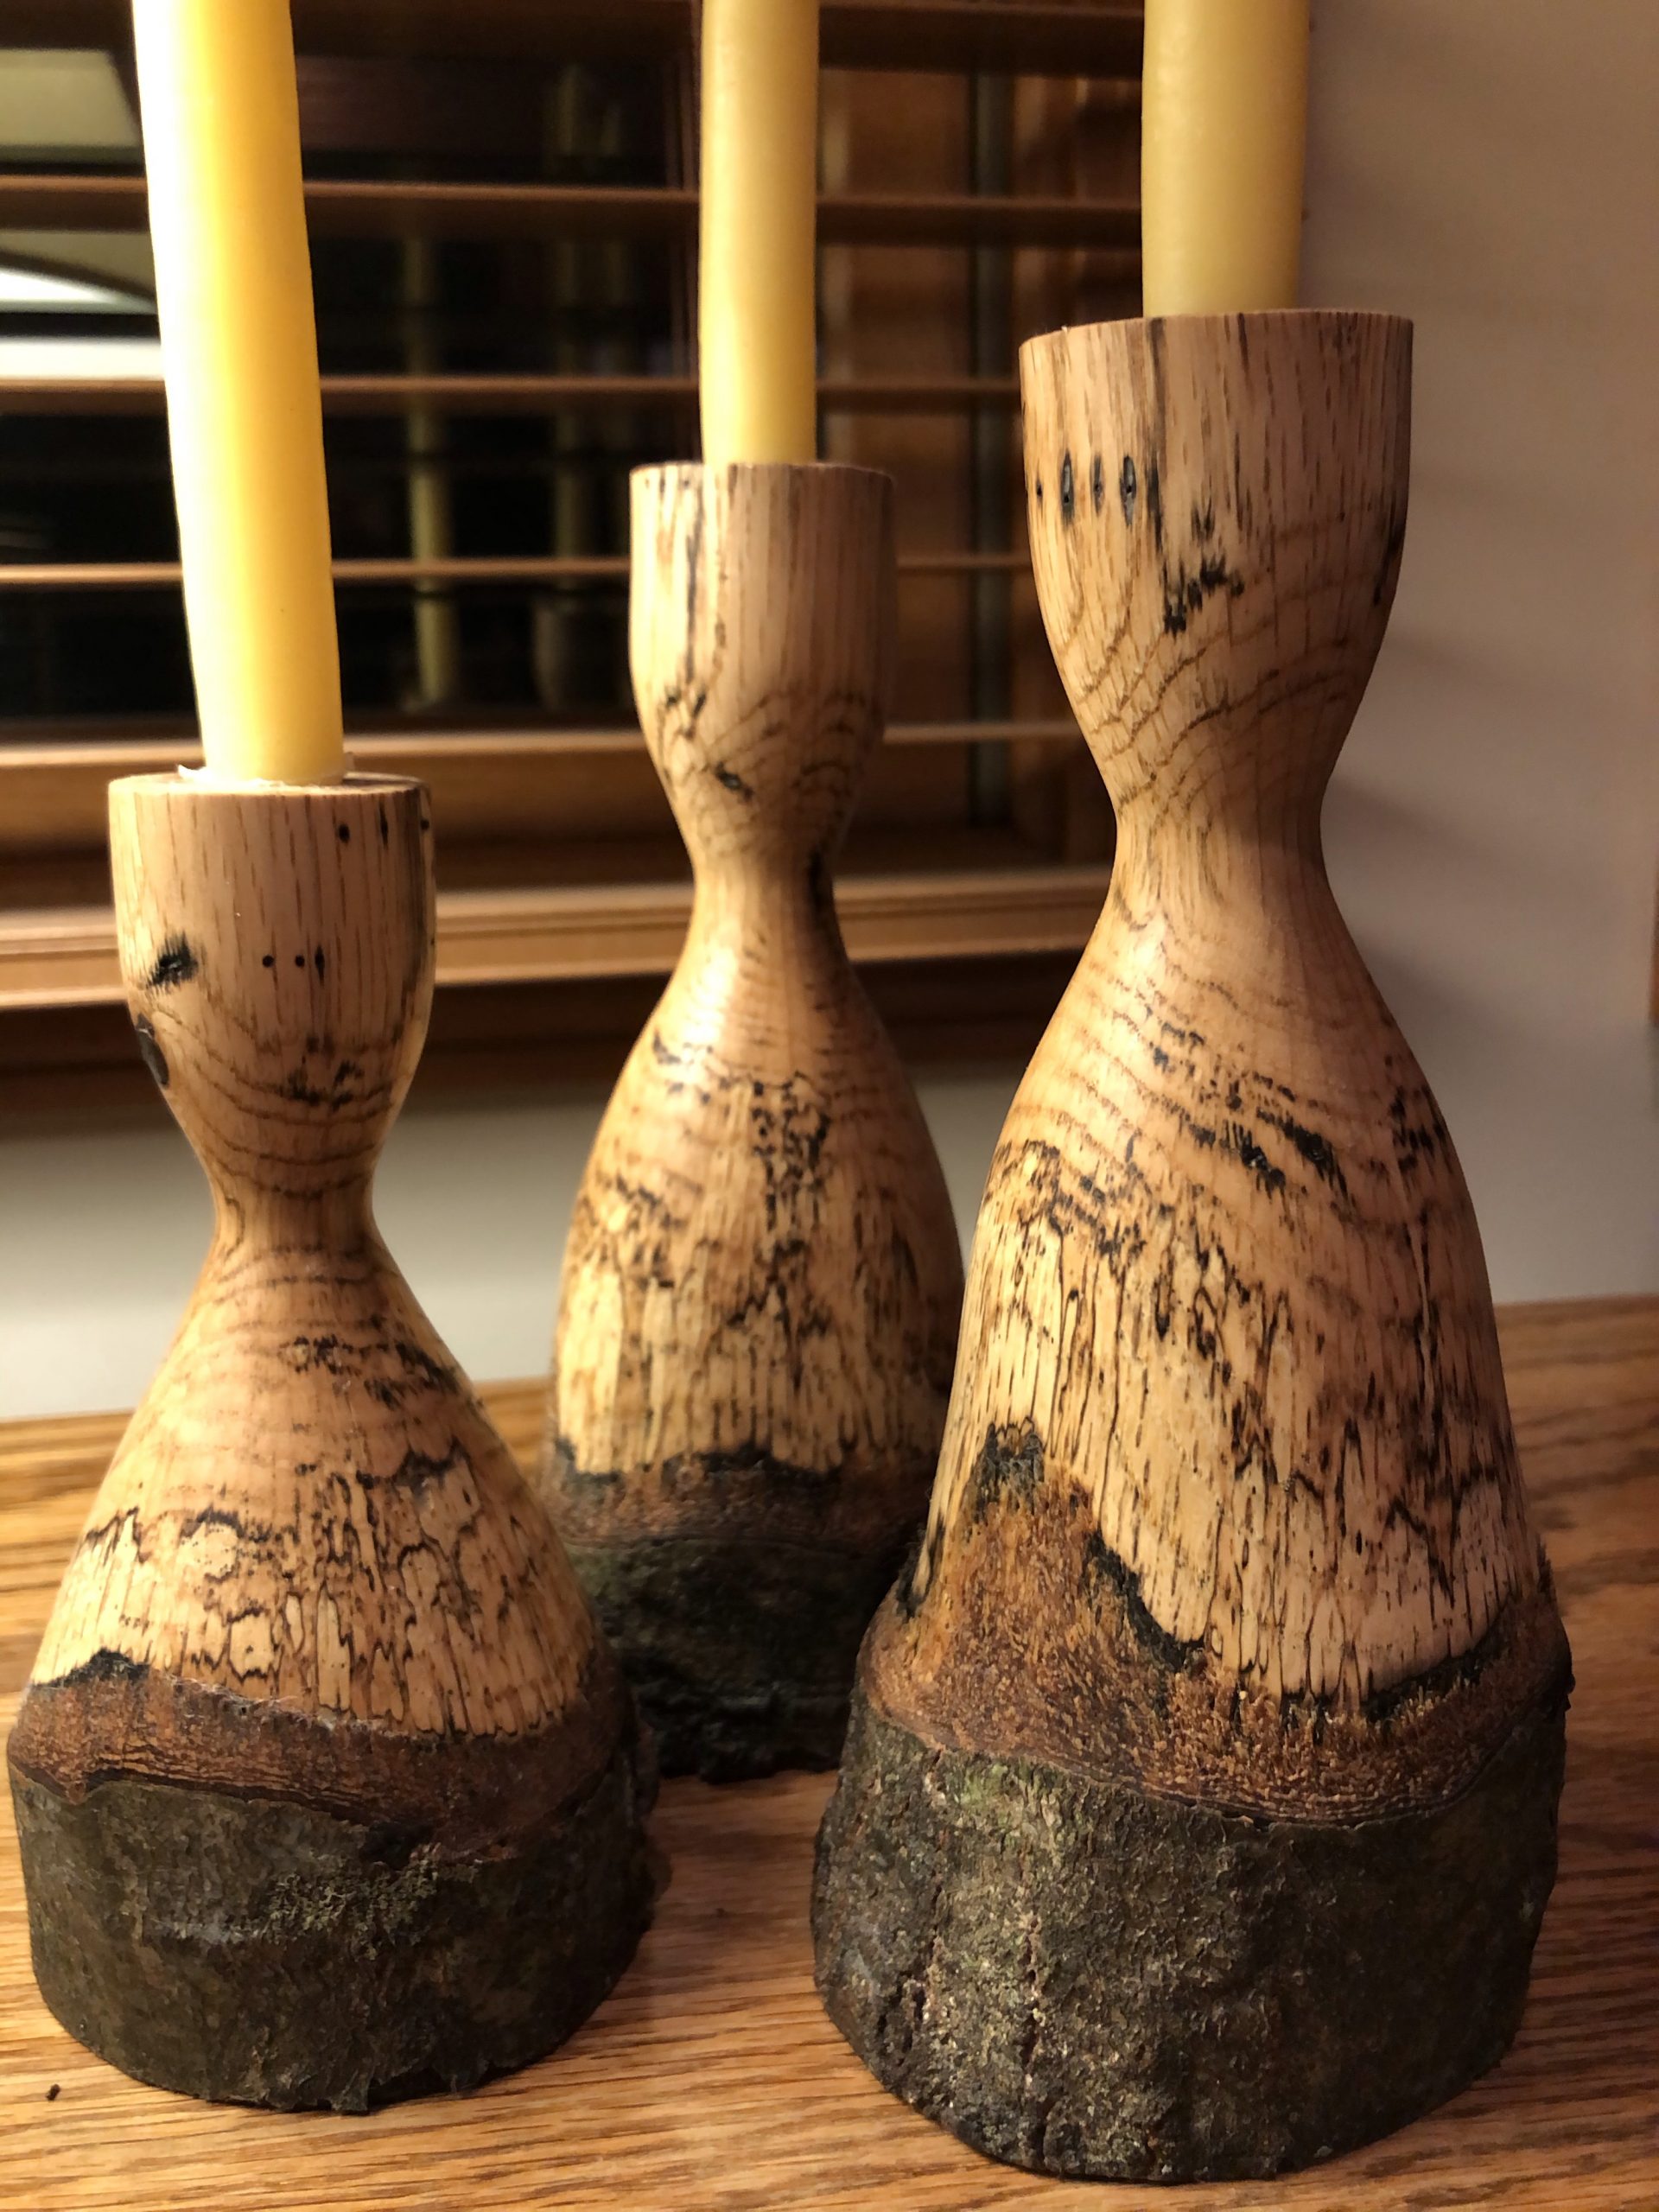
  • Turning Candlesticks on the Lathe


    ,

    Back in September I made a serious effort to learn how to turn wood on the lathe. I turned a few tenons on the stool legs earlier this year, but that is it. I was on the hunt for a good beginner project and Amanda asked for some candlesticks, so I got to work.

    As far as beginner/learning projects go, simple candlesticks are a great option. They take more planning than just making something round, but can be as simple or as fancy as you’d like. I didn’t get very fancy. I kept these to simple curves and let the wood grain shine.

    I made three sets:

    • 5 pine
    • 2 cherry, one with a live edge
    • 3 oak, all with a live edge

    The Pine

    I made the five pine candlesticks from a Douglas fir 4×4 post left over from making our garden boxes this spring. They were inspired by a set that Amanda saw at West Elm.

    I turned two individually, then planned ahead and turned three at once:

    I finished them with mineral oil and beeswax. We used them at Thanksgiving and now have them on our mantle:

    The Cherry

    I turned the cherry candlesticks from some beautiful black cherry wood that my friends Erin and Tyler brought to me from a tree that they had cut down on their property. I sent these candlesticks as a thank you.

    Since I turned these from a small log that the bark was still on, the grain pattern is completely different than the pine. It also had some cool bug damage inside that I kept. I chose to give one of them a live edge by leaving the bark on. I also finished these with mineral oil and beeswax.

    They look great on Erin and Tyler’s mantle.

    The Oak

    The oak candlesticks came from a limb off of a huge oak that fell in the woods at the end of our street. The trunk of the tree was pretty rotten, but the limbs I cut had some beautiful spalting. I loved the live edge I put on one of the cherry candlesticks, so I decided to make all three of these live edge.

    I made a leveling jig to level the tops of these.

    Finished!

    What I learned about turning through this project:

    • Sharp chisels make a world of difference. I bought a jig to make sharpening on the Shopsmith faster and easier.
    • Turning green wood (the oak) is very fast in the initial stages, but then it needs to dry for a few days before final shaping and sanding.
    • How to center irregularly shaped pieces of wood.
    • How to turn multiple items at once with a little planning.
    • Never turn something without planning it out first. “Figuring it out as you go” doesn’t work very well on a lathe.
    • Sanding something to 220 grit vs 800 grit makes a big difference. 800 almost makes the piece shine.
    • Sanding is easier with long strips of sandpaper that you loop under the work piece vs pushing a piece of sandpaper against the piece with your hand.
    • I used a step drill to make the holes in the top for the candles because it ends up tapered to better hold the candles.
  • Dad has a blog!


    My Dad now has his own blog: clgrimmett.com

    He is using the Seedlet theme and is hosted at Pressable. His first post is about firewood. Go check it out!

  • Turning Christmas Ornaments


    ,

    We decided to change up our Christmas decor this year and go with an all natural aesthetic. Dried orange and cranberry garland, a basket instead of the tree stand, and wooden ornaments.

    I’ve been learning how to do lathe work this year, so after Thanksgiving I started turning ornaments. I’m still pretty new to turning and had to throw about as many as I saved into the burn pile. Frustrating, but that is the way it goes when learning a new skill.

    I first roughed them out and shaped them with a spindle gouge, then sanded them down with 80, 150, and 220 grit successively. On some of them I paused here and cut decorative grooves with a skew, then finished sanding with 400 and 800 grit. Then I cut them off the lathe, sanded the top, drilled a hole for the hook, and screwed in the hook.

    I coated the ornaments with a mixture of beeswax and mineral oil that I heated up and buffed on with a rag.

    Learnings

    • Green wood, especially branches of a similar diameter as the finished ornament (and thus have the heartwood in the middle) will crack every time when they dry. This is why the spalted oak doesn’t have decorative grooves.
    • Turning without a center at both ends (like with a chuck that grips the wood from the outside) is a lot more delicate than turning with two centers. The wood can flex and cause a catch!
    • Using skews is tricky. I still catch more often than I’d like.
    • If you can turn the entire piece without removing it from the chuck, you should. It is very difficult to get it positioned exactly as it was, so you’ll have to reshape the piece after you put it back in the chuck.
    • Your chisels need to be super sharp when dealing with soft wood like cedar or pine, or else it will tear out. I have no finished pine ornaments and only one finished cedar ornament, but I tried five others.

    In progress shots with a piece of oak:

    Here are two in-progess shots of the spalted oak ones that eventually split. I turned them both out of a single piece:

    Finished ornaments. The small spoon is a hand-carved bonus!

    The whole set:

    Here is how they look on the tree:

    Merry Christmas!

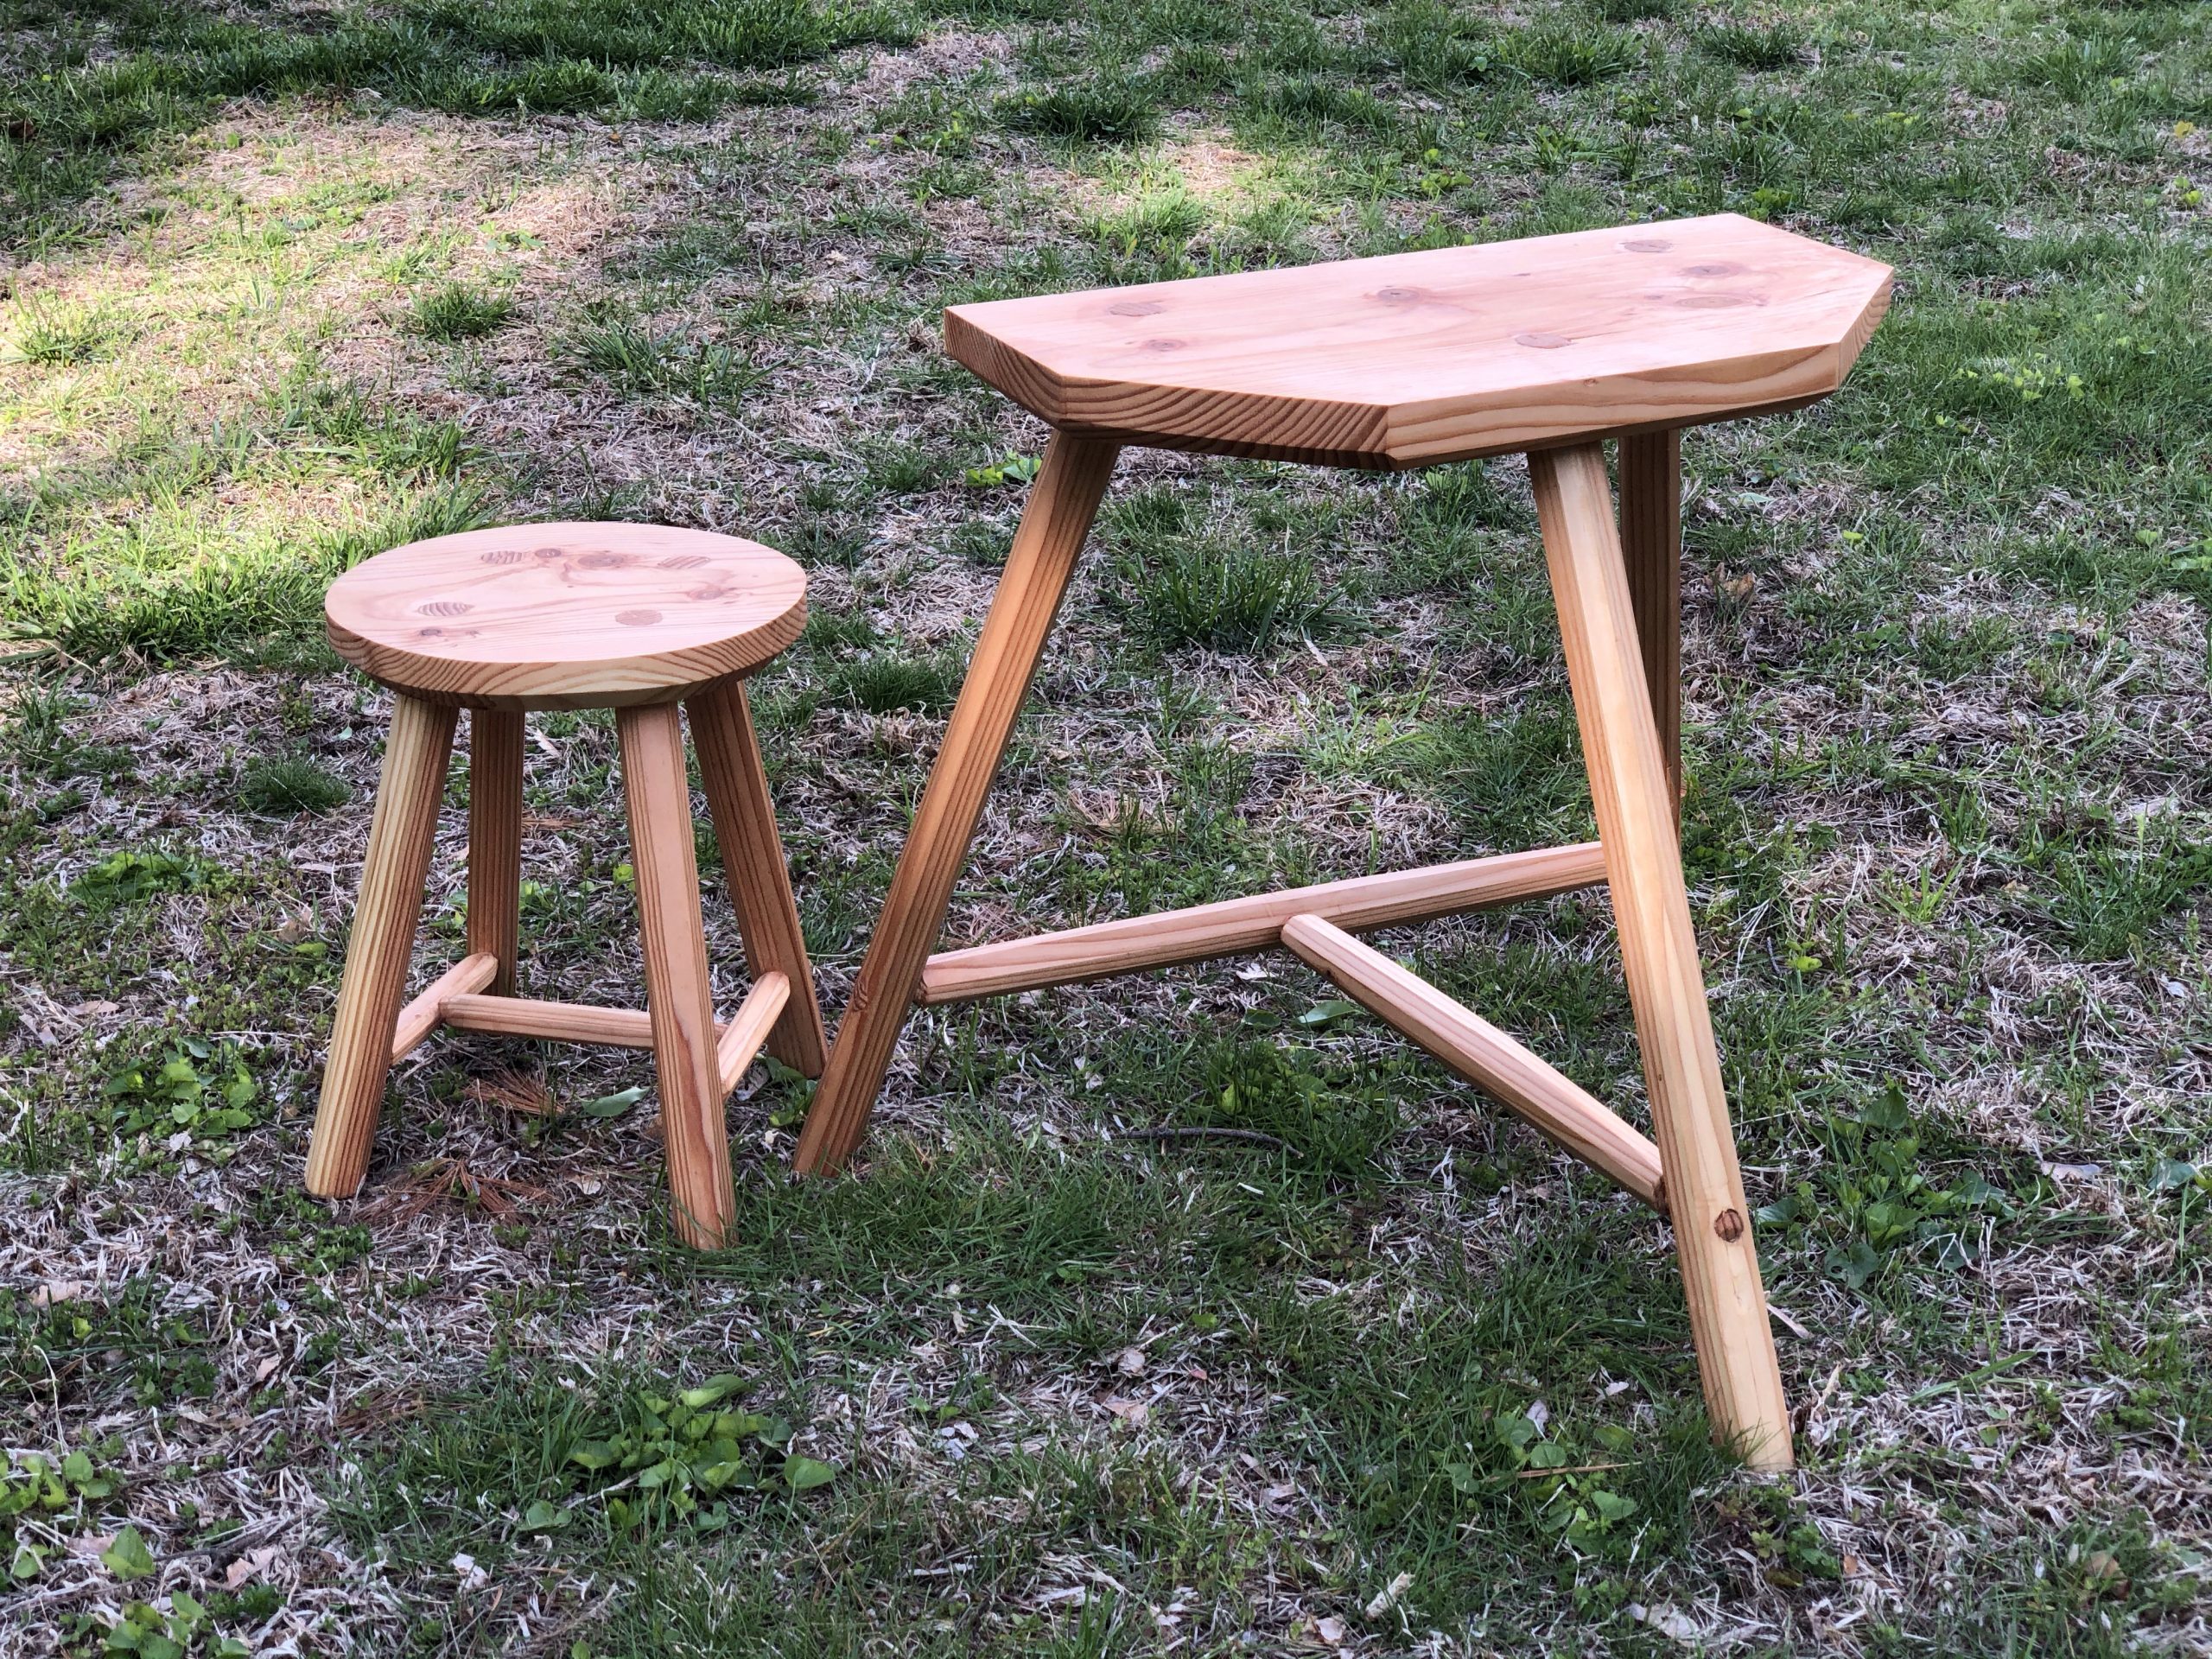
  • Two Staked Wooden Stools from The Anarchist’s Design Book


    ,

    I love staked wooden chairs and I want to learn how to make them, so I picked up The Anarchist’s Design Book from Lost Art Press. All of their books are top-notch and I highly recommend them. Christopher Schwarz’s introduction on what he means by “anarchist” resonates deeply with me.

    I figured I’d start small and work my way up: Make a low stool, then a high stool, then try one of the simpler armless chairs before going all-in on a staked arm chair.

    Low Stool

    First, I had to make some concessions: I used Douglas Fir instead of hardwood for the seat because it was all I had on-hand and we were in the depths of the pandemic. I had a few 2x12s sitting in the rafters of my shed. I wanted to avoid a glue up, so I made the seat a bit smaller than the plans.

    Second, after I had the thing made and was flipping through the book again, a tiny slip of paper fell out. It read “Errata.” Sure enough, it was about the low stool. The angles of the legs were off, so mine looks pretty different from the plans. Oh, well. I learned a lot in the process and it made the second one easier.

    Glue up!
    Finished stool.

    High Stool

    I learned a lot while making the low stool, especially about shaping the legs and cutting the tenons on them, so I was a more confident on this one and it went faster.

    Checking to see if the holes I drilled for the spreaders line up. Looks good to me!

    The perils of pine: Sometimes breaks happen. Always make extra legs.

    Bummer.
    Dry fit pre-glue up.
    Post glue-up, pre-trimming, pre-finishing.

    Here are the finished stools!

    I finished both with boiled linseed oil and beeswax.

    The low stool lives in my office as a small side table next to my reading chair, where it is often adorned with books and coffee. The high stool lives in my shop and I use it every time I’m in there, whether while carving, working at the bench, or just taking a break. We often pull it out and use it as a s’mores station by the campfire, too.

    What’s next?

    I’m planning on making another low stool with a hardwood seat. I have both Cherry and Oak right now and can do a glue-up.

    After that, I want to make a staked back chair without arms. Working my way up!

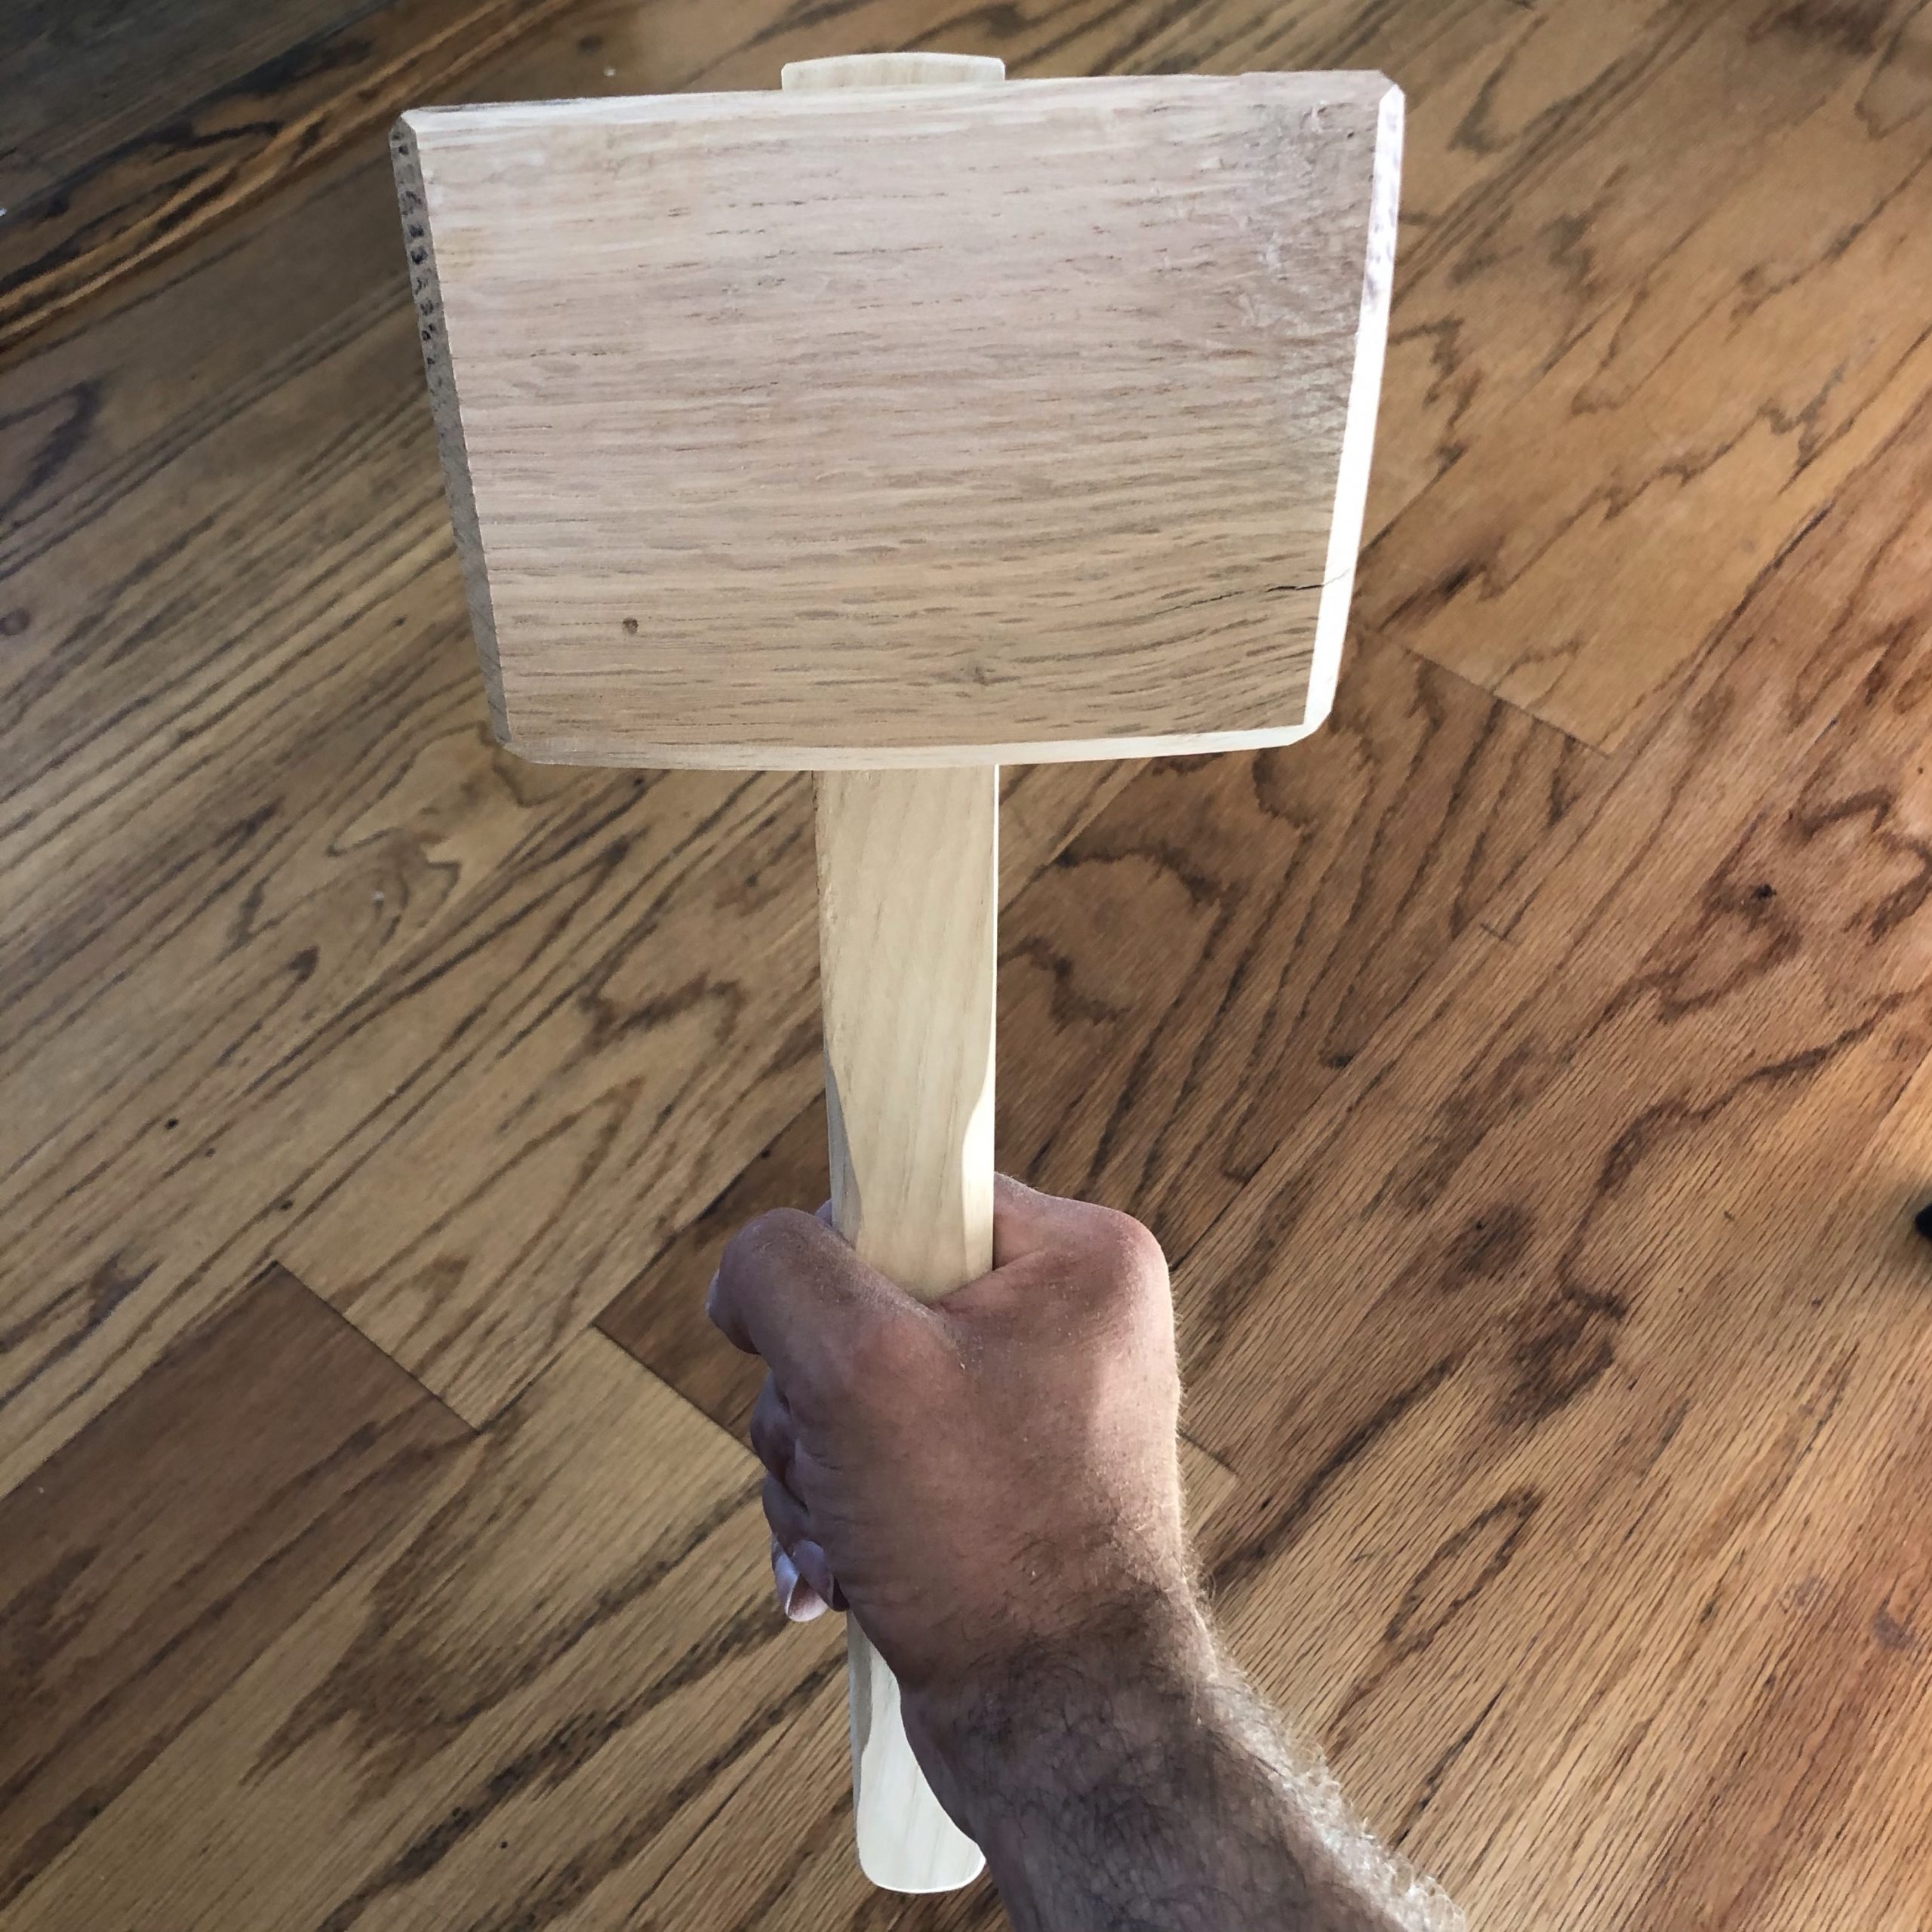
  • Wooden Joiner’s Mallets


    ,

    I made three wooden joiners mallets this year, following the Paul Sellers videos (1, 2, 3).

    The first has a head of laminated Beech and an Ash handle. Mostly because that is what I had around!

    There are no nails or screws in these, just wooden joinery. The handle and mortise in the head are both tapered to ensure a snug fit.

    The process is pretty simple: Cut the head and handle to size, find the centers, plan out your mortise, drill out the mortise, chisel the mortise the rest of the way, shape the head, shape the handle, then coat!

    Drilling the mortise with a brace and auger bit

    I finished it with a mixture of boiled linseed oil and beeswax.

    It is rougher than the next two I made, which is to be expected for my first time cutting deep mortises like this with a chisel. I also didn’t pay as much attention to the corners as I did with the later ones. I don’t love the way this one looks, so I use it as my main mallet for chisel work and don’t mind banging it up.

    After learning a few lessons on the first one, I made two more with Oak heads. One was a Father’s Day gift for my Dad with an Ash handle and the other has an Oak handle as well and is kept on the house bar for crushing ice. I didn’t take any progress pictures unfortunately. I did get to use my first mallet to make these, though!

    I opted to let the heads soak up mineral oil to give them a little extra heft and to help keep them from splitting. After they soaked up oil for a few days, I let the surface dry out a little bit and then coated them with Mighty Bull’s Wax Archived Linkfrom Corey’s Bio Blends.

    The ice crusher has a shorter handle and a smaller head. It works great with a Lewis bag!