
Category: TIL
-
Action Scheduler clean up
Read more…: Action Scheduler clean upAction Scheduler is a library for triggering a WordPress hook to run at some time in the future. It is used in a lot of large plugins to handle background processing of large job queues. It is an extremely useful tool. Unfortunately, it is also easy for bugs to make the queue or logs explode…
-
How NYC handles snow
Read more…: How NYC handles snowIt is common knowledge that NYC puts blades on garbage trucks to plow snow: One thing I didn’t consider is that switching to electric garbage trucks impacted their effectiveness as snow plows. My friend Trevor, who designs and installs efficient energy systems in buildings in NYC, told me a few other things this weekend about…
-
I asked Eric Davis about the difference between …
Read more…: I asked Eric Davis about the difference between …I asked Eric Davis about the difference between bsky.app and bsky.social and why a single login works in both places. His answer: so your Personal Data Server (PDS) is hosted by Bluesky (the company) at bsky.social(*) when you log into bsky.app you’re actually firing off a request to bsky.social to authenticate (check devtools, it should…
-
TIL ch is a length unit in CSS. …
Read more…: TIL ch is a length unit in CSS. …TIL ch is a length unit in CSS. So if you want to limit something to roughly 50 characters and add an ellipsis at the end if there is overflow, you can do something like: Also on: website
-
Improving Jekyll Build Time
 Read more…: Improving Jekyll Build Time
TIL how to improve the build time on my Jekyll site. Here is what I did to cut my build time in half.
-
Troubleshooting Problems Installing Craft CMS on Laravel Homestead
 Read more…: Troubleshooting Problems Installing Craft CMS on Laravel Homestead
TIL that PHP 7.2 doesn’t support mcrypt and MySQL 5.7.5+ changed GROUP BY behavior. Both break Craft CMS. Here is how to solve those issues.
-
Changing the CSV Delimiter and Enclosure Characters on a Mac
 Read more…: Changing the CSV Delimiter and Enclosure Characters on a Mac
TIL that you can’t change the CSV delimiter or enclosure characters on Excel for Mac or Apple Numbers. You have to use Open Office.
-
Building JSON for WPComplete in Excel with Concatenate
 Read more…: Building JSON for WPComplete in Excel with Concatenate
TIL how to build JSON strings in Excel with concatenate.
-
macOS Excel Fill Down Keyboard Shortcut
Read more…: macOS Excel Fill Down Keyboard ShortcutI never remember the keyboard shortcut for Fill Down in Excel on macOS, so I’m posting it here where I’ll have it. Control + D.
-
How to Back Up Your Laravel Homestead Databases
Read more…: How to Back Up Your Laravel Homestead DatabasesToday I upgraded from Homestead 4.0.0 to 5.0.1 so I could test my sites in PHP 7. That was a major upgrade and a number of things changed, so I decided that I needed to back up my databases before I did the upgrade. I’d only ever dumped specific databases before, but TIL how to…
-
SVG Viewbox
 Read more…: SVG Viewbox
TIL how to use the viewbox attribute on an SVG to make it responsive and preserve the aspect ratio.
-
Persistence with Chrome Dev Tools
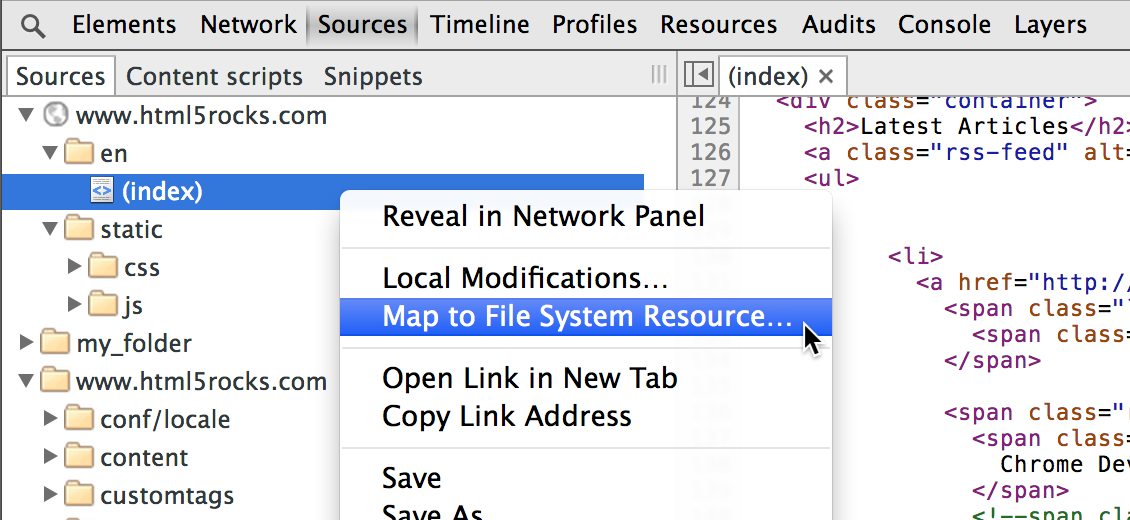 Read more…: Persistence with Chrome Dev Tools
TIL that you can save changes you make with Chrome Dev Tools directly to your disk.
-
CSS Confetti
 Read more…: CSS Confetti
TIL how to make confetti with CSS. No javascript needed.
-
WordPress Template Hierarchy
 Read more…: WordPress Template Hierarchy
TIL a ton about the WordPress template hierarchy and the conditionals that select them.
-
Genesis Framework’s Hooks and Filters
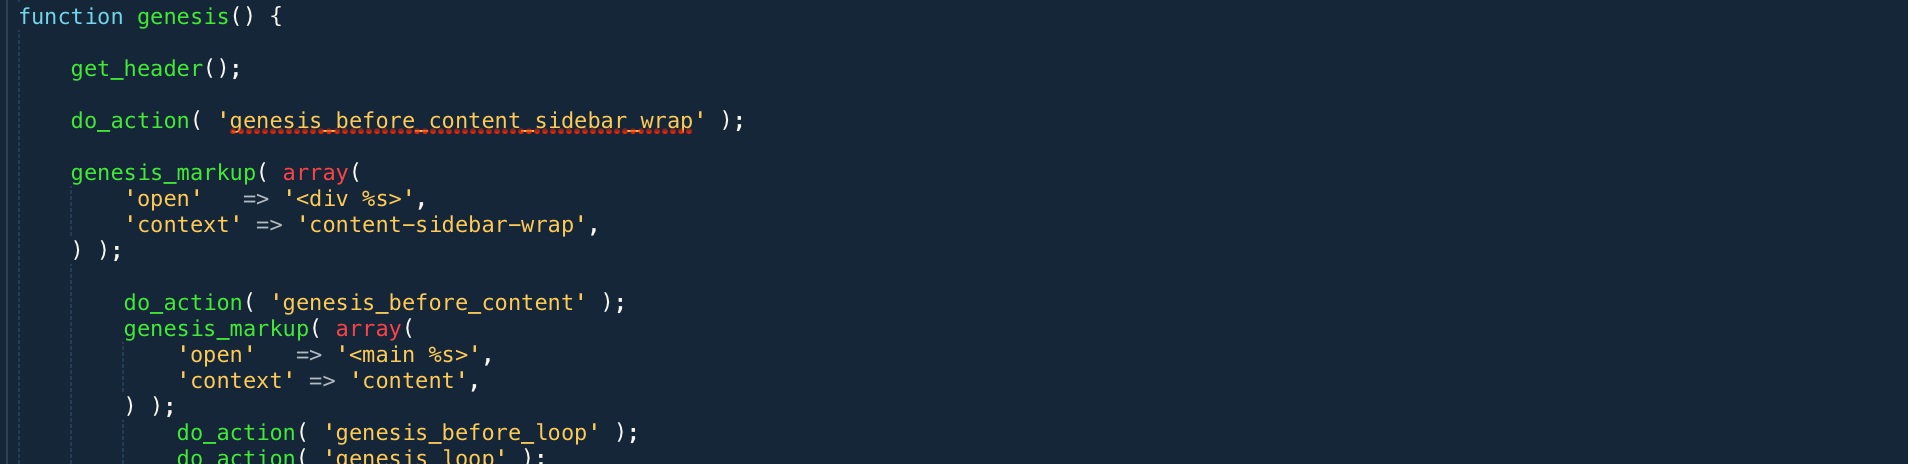 Read more…: Genesis Framework’s Hooks and Filters
TIL about Genesis hooks and filters.
-
CSS Grid
 Read more…: CSS Grid
TIL about CSS Grid
-
Basic Elements of Communication
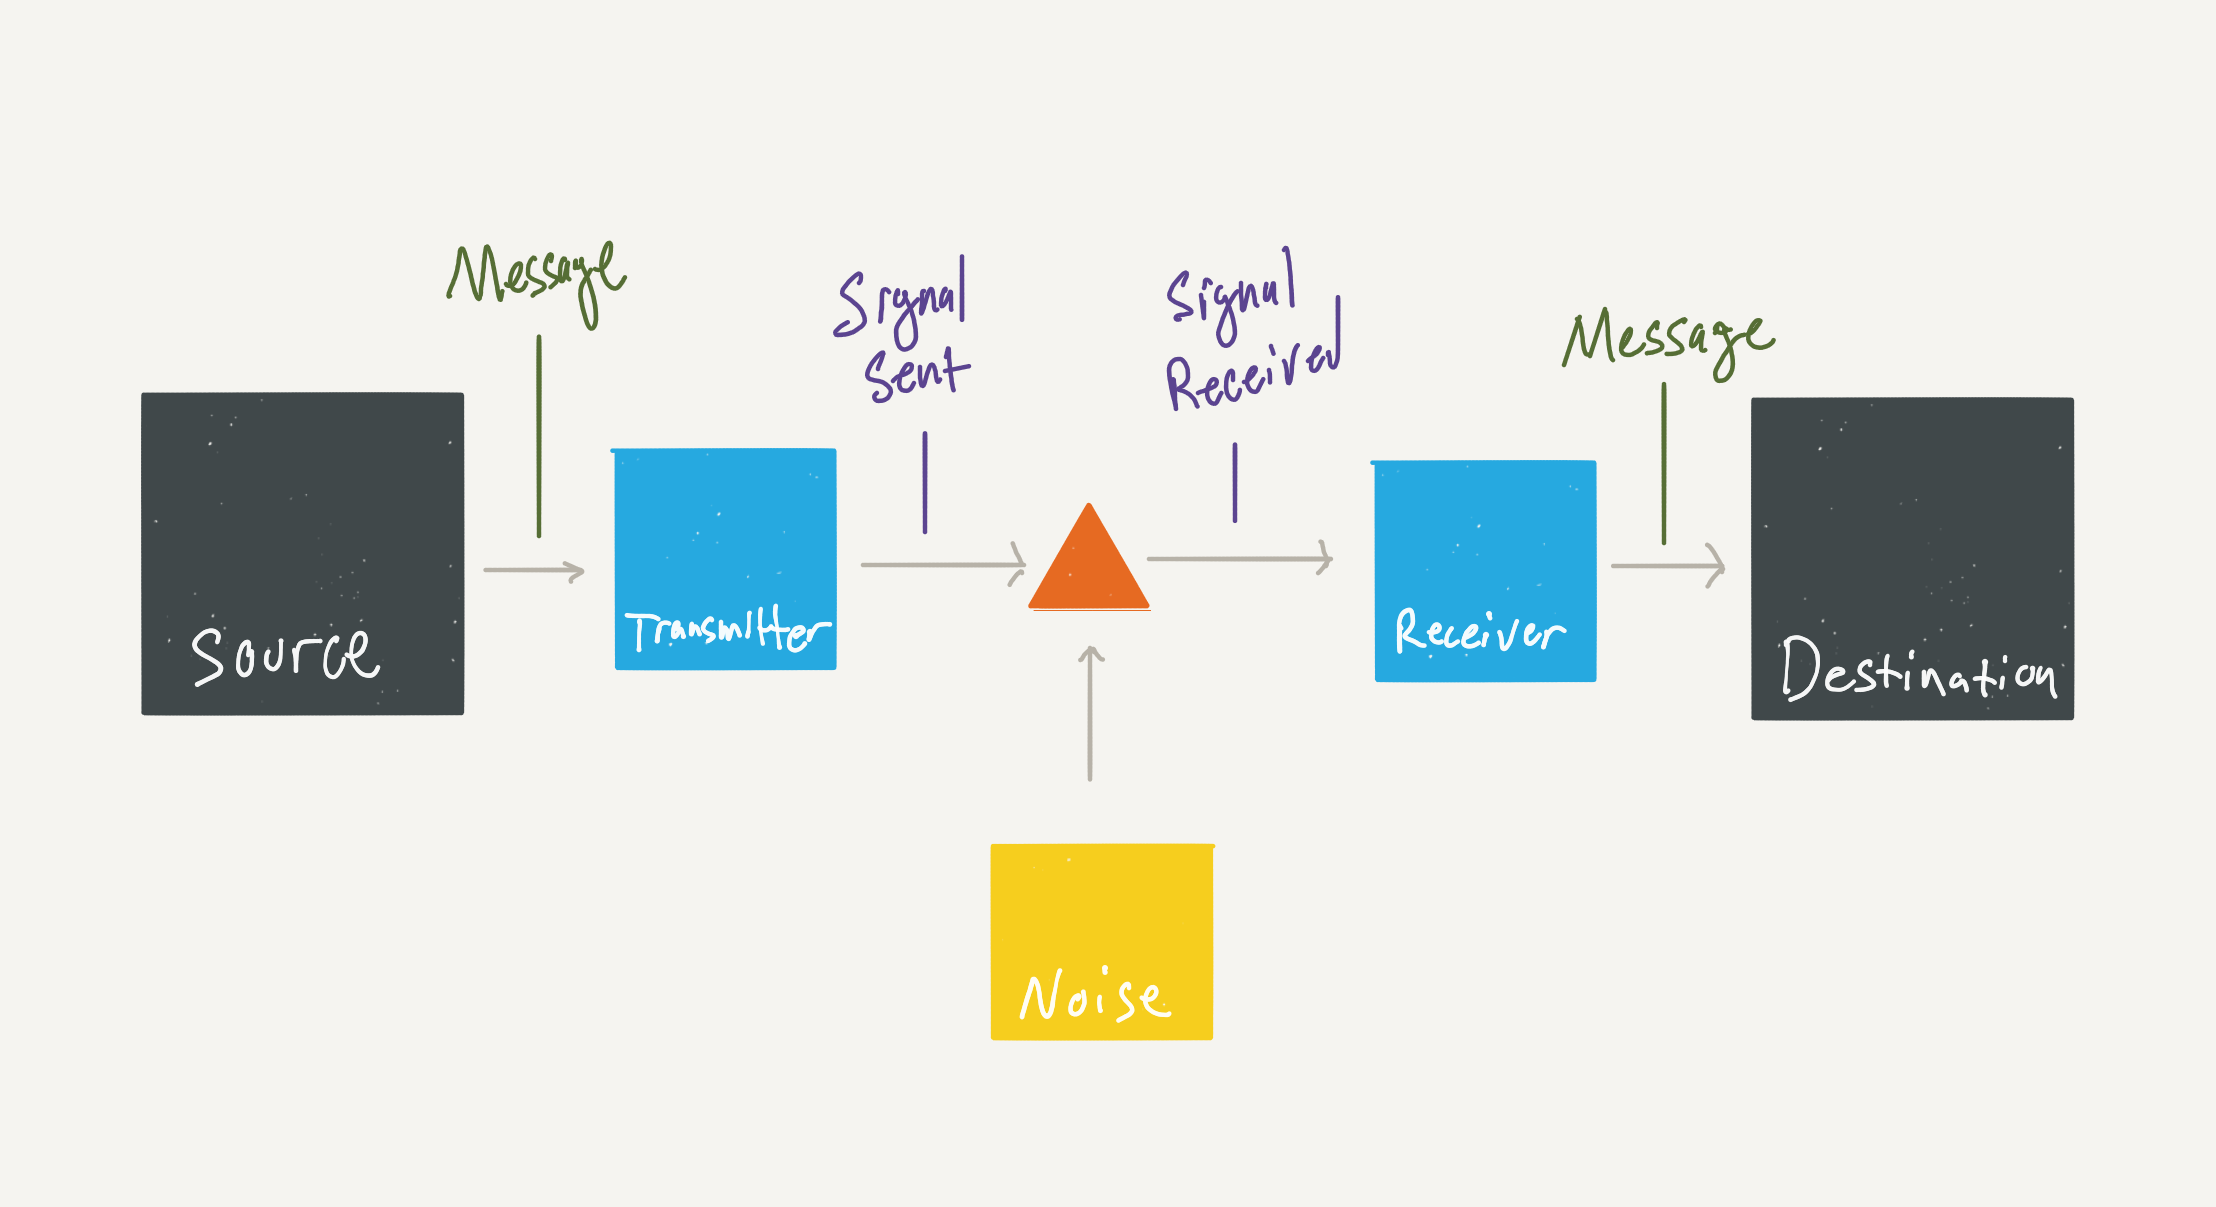 Read more…: Basic Elements of Communication
TIL that all forms of communication can be described by the same process, no matter the sender, receiver, or medium.
-
Remember to Ask for Help
 Read more…: Remember to Ask for Help
I don’t know all the answers, even if I think I do. Sometimes I need to ask for help.
-
Responsive Breakpoints in Sass
 Read more…: Responsive Breakpoints in Sass
How to structure responsive breakpoints in Sass, with examples.
-
Bulk Clearing Expiration Dates in Restrict Content Pro
 Read more…: Bulk Clearing Expiration Dates in Restrict Content Pro
At Praxis we use Restrict Content Pro as the membership system for our curriculum portal. We decided that all grads get access for life, not just during the program. So, I needed a way to clear over 200 member expiration dates. Here is how I accomplished that task with SQL.