
This is part 4 of my workshop upgrade series. Previously:
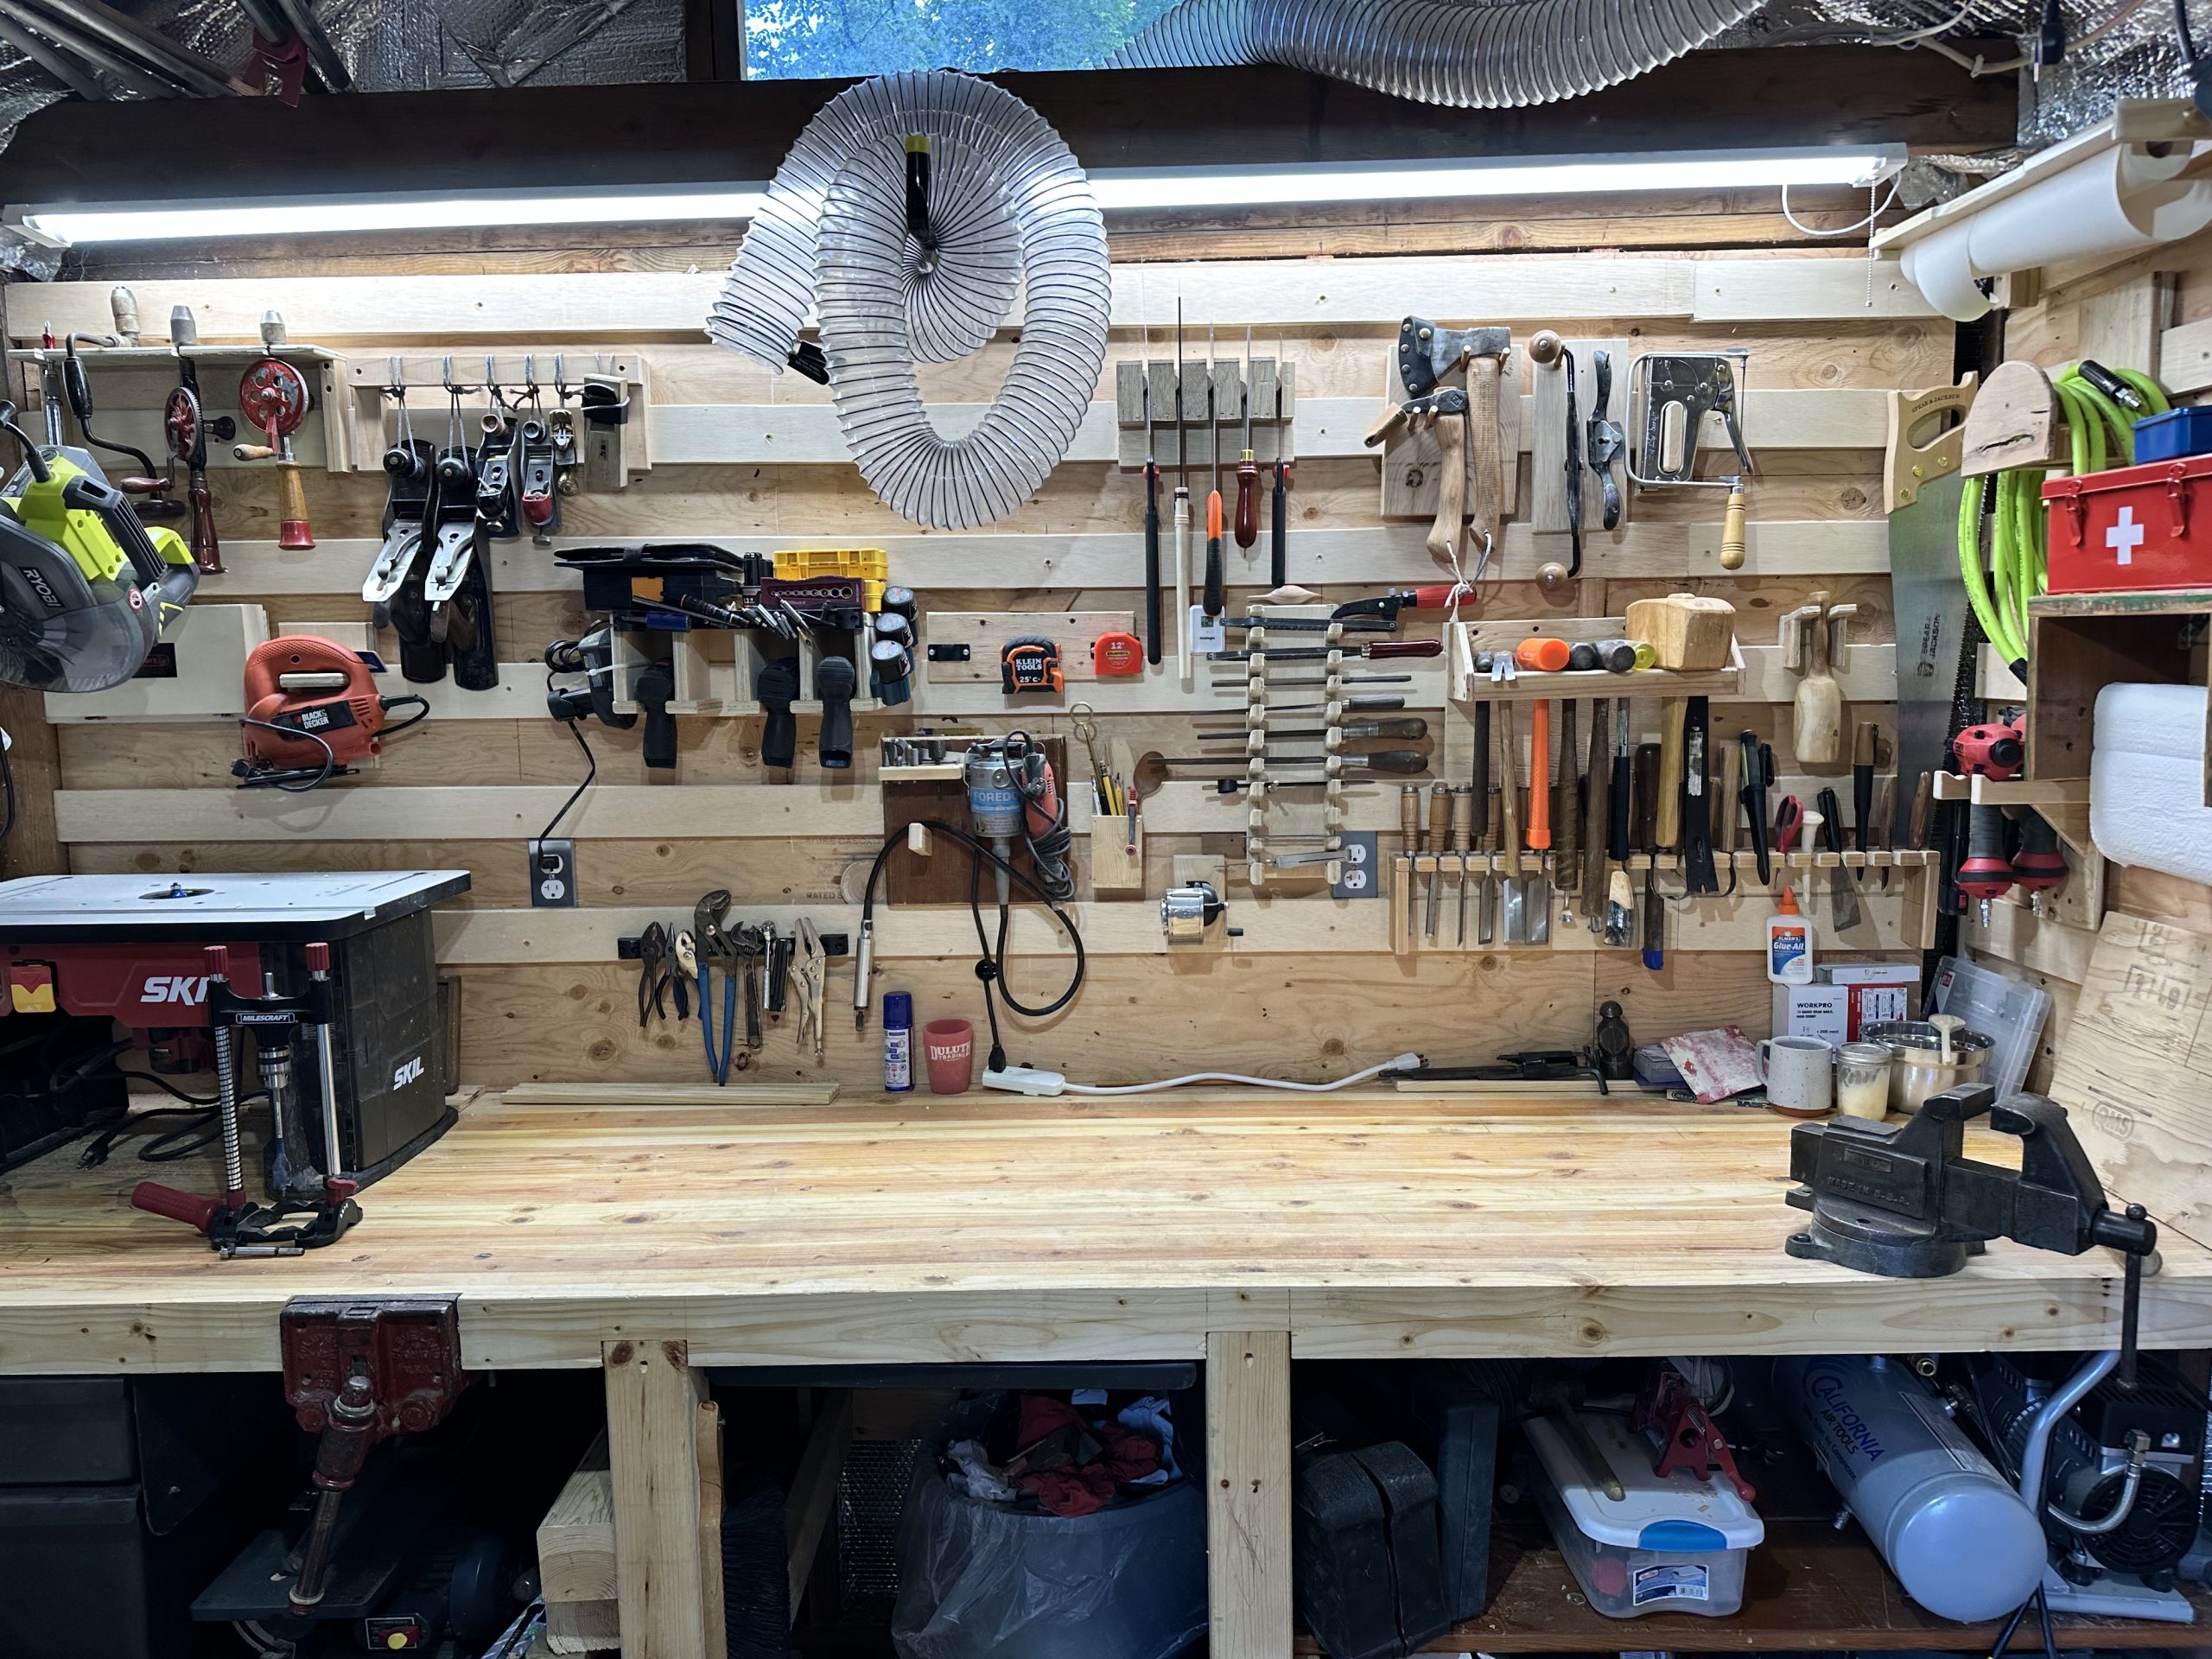
One of my goals with the workshop upgrade was improving my use of space. With only 10x14ft to work with, floor space is at a premium. To keep things off the bench, I need to get them on the walls, but I’m hesitant to make locations permanent. Enter French cleats.
Having used these for a couple months now, I love that I can reach out and grab what I need, then put it back when I’m done. Everything is in its place within arm’s reach. It makes a big difference.
Table of contents
Making the cleats
The cleats are made out of 3/4″ sanded plywood.
I first did a test on the smallest section of wall on the door side with some 3/4″ ply I had leftover from another project. I wanted a proof of concept to make sure I knew what I was doing. I used a 4.5″ mini circular saw and a guide to cut these, including the 45deg angle. Even though it worked, I decided that this would take far too long for the rest of them and decided to use a table saw for the rest.
I went to Home Depot after dinner on a weeknight to get the main batch of plywood and couldn’t find anyone “certified” to use the panel saw to cut it for me. I eventually found a hillbilly kid and tipped him, then he decided he knew how to use the panel saw. Pretty sure he wasn’t certified either, but panel saws aren’t hard to use and this kid was a hard worker. Fine with me. He cut the boards into 6″ strips.
That weekend I split the 6″ strips in half at a 45deg angle on the table saw. These served as both wall cleats and pieces to attach to tool holders. I did about a sheet and a half this way. I rounded off the sharp edges of the angled side on the router table (important because if saw dust or any debris gets down in your cleats, having a slight gap will keep them usable.)


In the shop I hung them with a 4″ gap on 2.5 walls. Spacers, a level, a driver, and drywall screws made quick work of this. I knocked it out in an afternoon. It helps that the plywood backing was already hung the week before.
For the pieces I had to cut to length, I used a 4.5″ circular saw. I probably would have set up the miter saw outside and used that if it wasn’t raining.


Tool holders
Now the fun part! Building tool holders. I spent a couple evenings searching around online for inspiration and put together this Are.na board with ideas: https://www.are.na/chuck-grimmett/french-cleat-ideas
Lathe chisels


Hammers


Chisel mallet


Stapler


Utility hooks


Pencil box
I made this pencil box out of old fence pickets when I was learning how to use my planer. Added a cleat offcut to it and cut it to match the profile.

Router bit case
Screwed a cleat to the back of the router bit case so I always know where it is.

Air nailers


Axe and adze
Axe and adze holder, complete with the patches for three incorrectly drilled holes so I remember to take my time whenever I look at it.


Air hose
Front is a piece of cherry that I couldn’t use because of the bug damage. I like it.


Pencil sharpener
The piece on top is a small wedge to lock it in place.

Spokeshave and draw knife

Drill organizer
Holds drills, drivers, bits, batteries, and a charger. I later added a magnet bar for quick bit access.


Rasps and files


Child’s workbench
This is for Charlie! As he grows, we can raise it up on higher cleats.


Chisels, gouges, and knives

Measure tapes
I used these nifty brackets. I also added one to Charlie’s bench later.


Foredom rotary tool
Rotary tool + bit storage, and the wires go into the wall so the foot pedal comes out under my bench.


Cord holder
A cord holder so I don’t have to go hunting behind my Shopsmith for the cord.

Bar clamps


C-clamps


Hand drills, push drill, and hand brace

Paper towels and first aid kit
There are some raised pieces under the first aid kit to keep it from migrating off.

Squares

Jig saw


Screw drivers

Planes

Floating hand saws


Saw blades
Pretty simple affair. A bolt goes all the way through and is held in place on the back with screws so it doesn’t move and is supported. The blades go on the bolt and are kept from falling off with a washer and nut.

I’m sure I’ll make more in the future, especially for some of my Shopsmith tools. I’m stopping for a while because I got everything that was cluttering my bench hung, which is what I set out to do.

If you have any questions about these, feel free to reach out!
Leave a Reply